Fotografie
How to take photos in Night mode on your Android
Master low light and nighttime shoots with these handy tips
17 Sep, 2025∙11 min


Fotografie
Master low light and nighttime shoots with these handy tips
17 Sep, 2025∙11 min
This guide is brought to you by Benedict Brain, a photographer, author, award-winning journalist and educator. He wrote You Will Be Able to Take Great Photos by the End of This Book and A Camera Bag Companion, both translated into multiple languages and sold globally. He writes the long-running The Art of Seeing column and lectures internationally on creative image-making.
There’s something magical about the way the world looks after the sun goes down. The fading light, moody colours and eerie atmosphere are visually seductive – but for many, low-light photography still feels like a bit of a gamble, often ending in murky shadows, motion blur or digital noise.
The good news is your Android phone – including models like the Samsung Galaxy A16 – comes equipped with Night mode to help overcome these challenges. And while Night mode is smart, there are times when Pro mode might give you more control, though both have their quirks. Let’s dig in and make your after-dark photography shine.

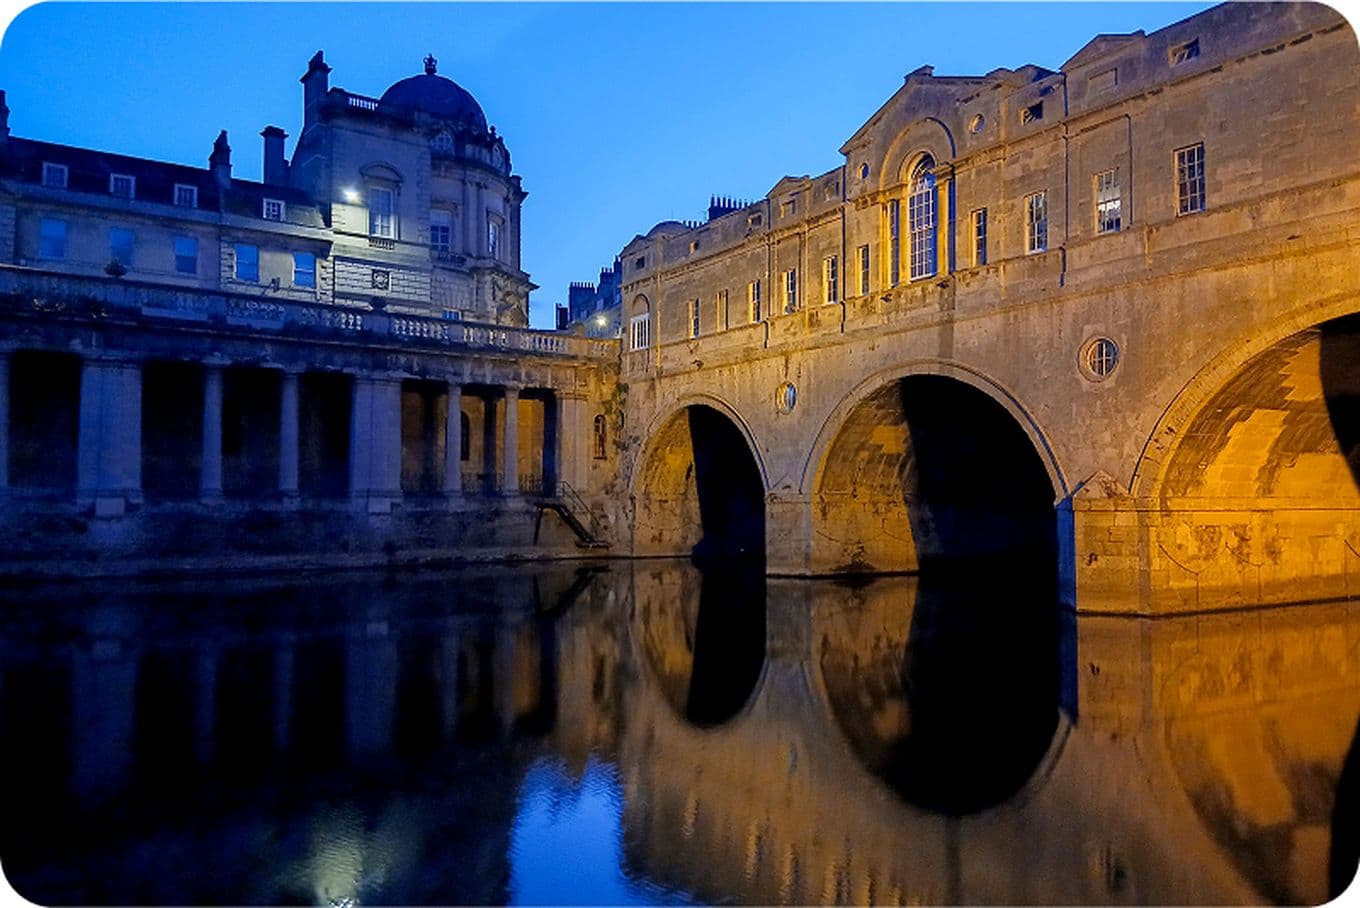
Night mode allows you to capture scenes that would be lost to darkness
Night mode on Android uses clever computational photography, combining a series of images shot at different exposures to create a final photo with improved detail and reduced noise. It’s essentially a digital long exposure, allowing you to capture scenes that would otherwise be lost to darkness.
On the Galaxy A16, select More, followed by Night. You’ll see a crescent moon icon – tapping it lets you adjust how long the phone gathers light, usually between one and 30 seconds. This will depend on the make and model of your Android phone. The Samsung Galaxy A16 used here is limited to two seconds; in this case, try Pro mode, where you can control the shutter speed. Longer exposures bring in more detail – but only if you can keep your phone steady.
Some Android phones will lock Night and Pro modes into the main lens, and digital zoom can degrade image quality. The workaround? Physically move closer or reframe your composition.
Night mode works best with a very steady hand. Better still, try leaning against a wall, resting your elbows on a table, or using a bag or coat to cushion the phone. A small tripod is helpful but not essential. Even mindful breathing and stillness can significantly improve sharpness.

Night mode works best with a steady hand
There are times when Night mode doesn’t give you the control you want. That’s where Pro mode comes in. On the Galaxy A16, Pro mode lets you manually adjust shutter speed, ISO, white balance and focus – ideal if you want to fine-tune your shot rather than rely on the phone’s algorithms.
It’s particularly useful for more creative or precise shots, such as motion blur, light trails or tricky lighting conditions. Want to darken the scene for mood? Need to lower the ISO to reduce noise? Pro mode gives you that control.
However, Pro mode on the Galaxy A16 also has its limits. You can’t switch between lenses here either – you’re still limited to the main lens. But if you’re happy to work within that constraint, the manual flexibility is a big win.
Use Pro mode when you want to push your creativity, or when Night mode is overprocessing the image. But be prepared to steady the phone.

Pro mode lets you manually adjust shutter speed, ISO, white balance and focus
Before you press the shutter, tap on the part of the screen you want in focus. This brings up a brightness slider (a sun icon or similar). Drag it up or down to adjust exposure manually – this works in both Night and Pro mode.
It’s a simple but powerful tool. Use it to tame highlights (like neon signs or streetlights), or to bring out detail in darker areas. Just remember: don’t try to light up the whole scene. Let some areas fade into darkness – that contrast is what gives night photos their magic.
Shadows add mood and mystery. Use available light creatively – lampposts, shop windows, fairy lights, phone screens. These become your new light sources. Think about how they hit your subject: from the side for texture, from behind for atmosphere, from above for drama.
Let some areas fade into darkness – contrast is what gives night photos their magic
Night mode isn’t just for landscapes and cityscapes – it can transform portraits, too. The trick is keeping still. Even slight movement from you or your subject can result in blur or ghosting.
If your phone supports it, try using Night mode for low-light portraits, but be aware that the depth of field effects (background blur) may not be as strong as in daytime Portrait mode.
Use single light sources like candles, lamps or phone screens for gentle, dramatic lighting. Ask your subject to stay still, take a few shots and check afterwards – often, one will be sharp while others are not.
Try framing a face by window light or a figure backlit by neon. These are fleeting, cinematic moments that Night mode can capture if you’re paying attention.
In the example, you can see how the ambient light looks much more atmospheric than it does when the phone’s flash is activated. The flash blasts unflattering light into the scene, making it look cold and stark without the cool nighttime vibe.
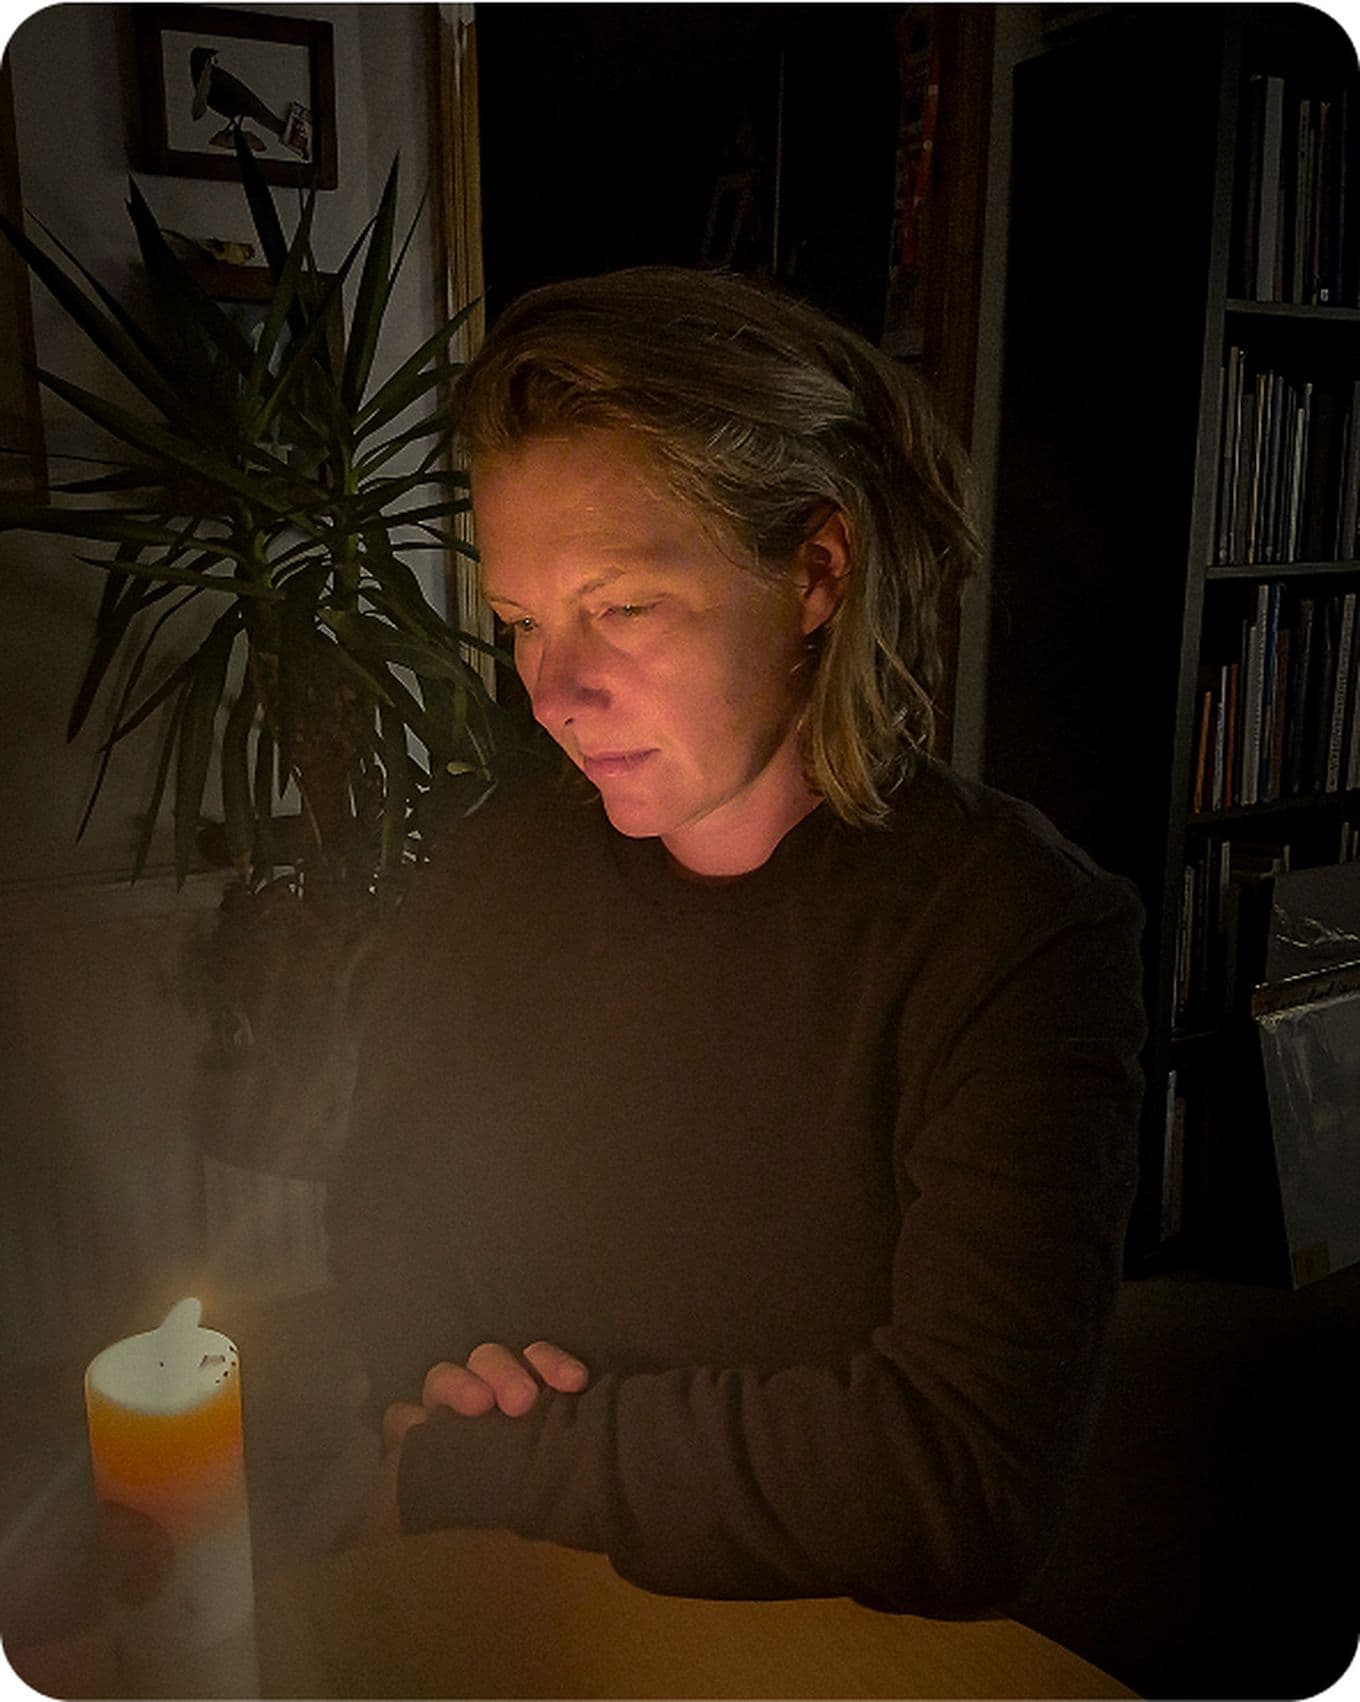
Use single light sources like candles, lamps or phone screens for gentle, dramatic lighting
If you want to push beyond Night mode, Pro mode lets you control shutter speed manually – ideal for long exposures. You can set it for one, two or more seconds (depending on conditions), but again, you’ll need a stable surface or tripod.
Use this to capture light trails from traffic, the glow of moving lights or the soft blur of motion. Set ISO low (such as ISO 64) to reduce noise, and use a remote trigger or self-timer to avoid camera shake.
Third-party Android apps like Camera FV-5 or ProShot give you even more flexibility with manual settings. They’re worth exploring if you want to move beyond the default camera app and experiment with painterly effects like flowing water or star trails.
Low-light photography rewards patience. Think of each scene as a blank canvas. Let the composition build slowly. Watch how shapes emerge from shadow. Pay attention to rhythm, line and the placement of light within the frame.
Let contrast guide your decisions. A person silhouetted by a bright shop window, the glow of a phone in a dark hand, reflections in wet streets – these all carry emotional weight.
Try unusual viewpoints: shoot from stairwells, crouch to catch puddle reflections or frame subjects against dusk skies. The night invites a slower, more curious way of seeing.
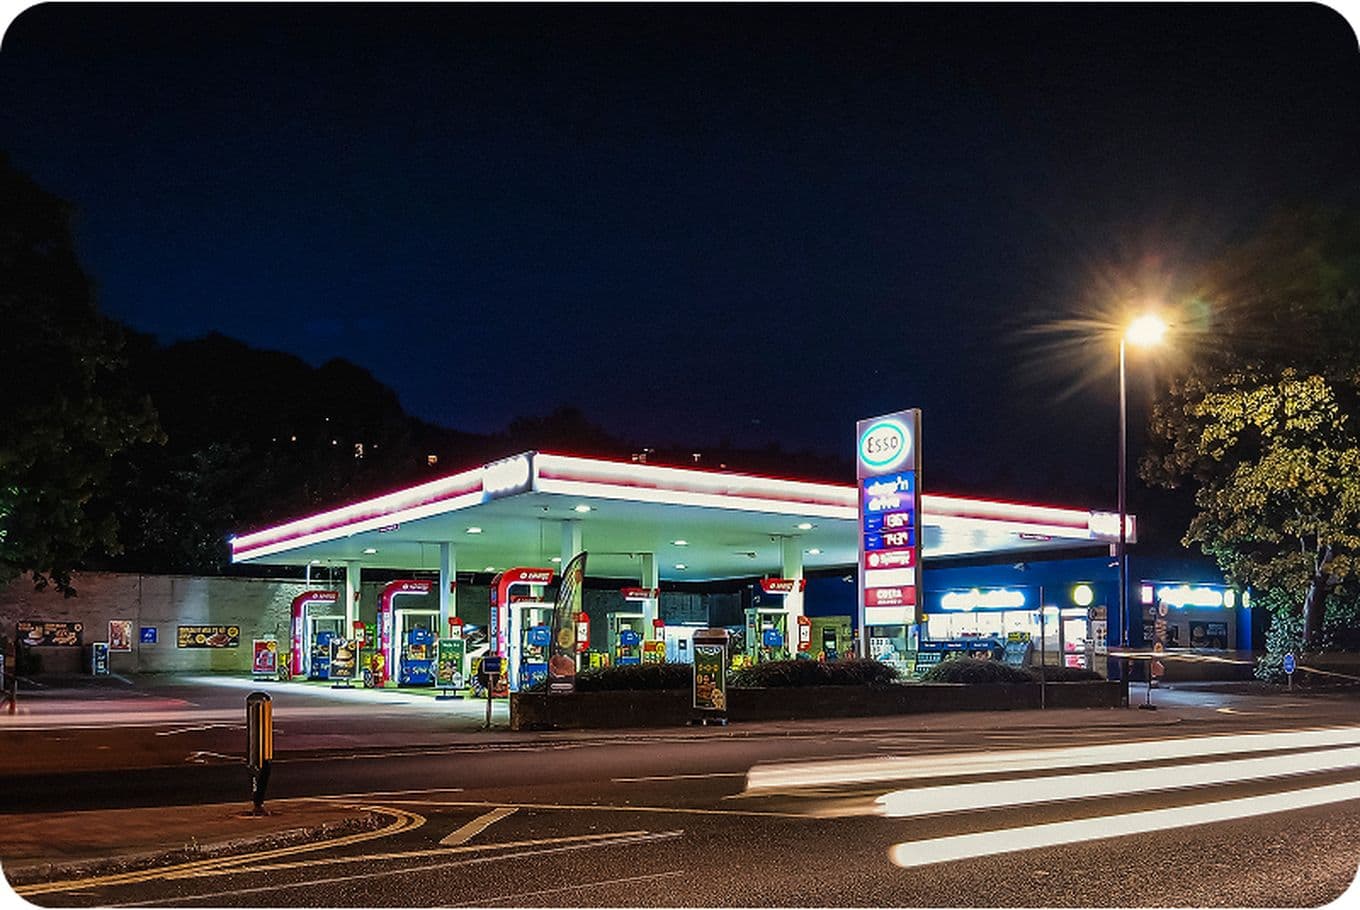
Long exposure is great for nighttime city scenes
Like anything creative, night photography improves with practice. Go out at dusk. Shoot in the rain. Take photos in your kitchen by candlelight. Notice how light behaves differently at night – it sculpts, hides and transforms.
Capture the glow of street signs, the quiet of backstreets or the intimacy of a friend lit by firelight. Photograph indoors, too: a sleepy pet in lamplight, a hallway with a single bulb, the flicker of a TV on faces.
Reflections and wet surfaces are your allies. Look for puddles, shiny pavements or windows. Night mode often reveals surprising depth and detail in these overlooked textures.

Night mode often reveals surprising depth and detail in overlooked textures
The next time night falls, don’t tuck your phone away. Whether you’re using Night mode or Pro mode on your Android, you’ve got a powerful creative tool in your hand.
Yes, there are limits – no lens switching, no perfect results every time – but with a steady hand and a thoughtful eye, you can capture the quiet brilliance of the night. The streets, the shadows, the stories – they’re all out there, waiting.
So head out. Linger by lamplight. Watch the world wind down. Breathe. See. Shoot.
Dank Popsas praktischer Gesichtserkennung und unseren Intelligenten Alben kannst du Erinnerungen jetzt noch schneller wiederfinden.


Mathias Fernandes
Reise- und Abenteuerfotograf
4 Aug, 2025
&w=3840&q=75)
Emily Kudiersky
Tierfotografin
17 Jun, 2025∙5 min

Bella Falk
Reiseautorin und Fotografin
28 May, 2025∙7 min