Photography
What is golden hour and how can it transform your travel photography?
Capture people and places at their very best with our guide to every photographer’s favourite time of day.
28 May, 2025∙7 min


Photography
Capture people and places at their very best with our guide to every photographer’s favourite time of day.
28 May, 2025∙7 min
If you’ve ever grabbed your smartphone to snap a glorious sunset, or taken a flattering selfie in warm afternoon light, you may have been bewitched by golden hour without even realising it.
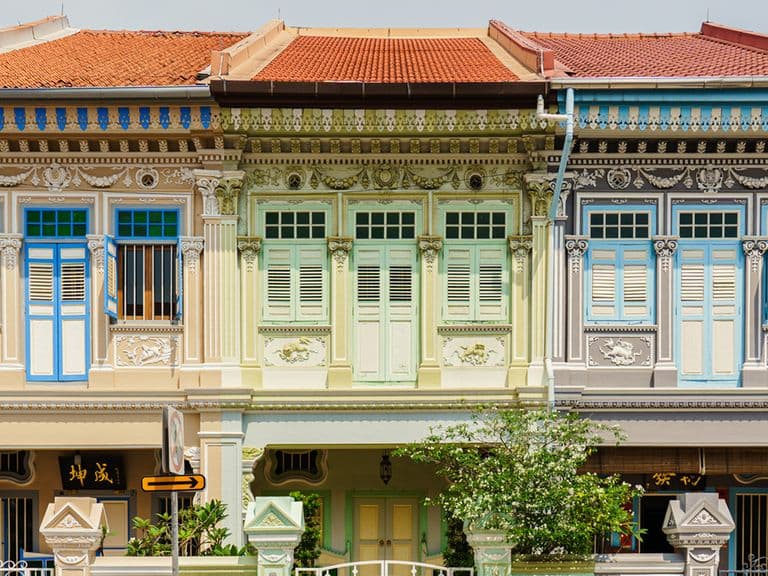
Golden hour – also referred to as “magic hour” – is the time just after sunrise or before sunset when the sun sits close to the horizon and bathes the world in a honey-toned glow. Gone are the harsh glare and deep shadows of broad daylight, which are replaced by soft light and warm colours that make everything look cinematic.
Golden hour light is loved by photographers because it flatters everything. It softens faces, adds shape and texture to landscapes, and makes colours pop. For travel photography, it can turn a featureless beach or a concrete cityscape into a rich, romantic scene and the sun’s low angle also allows you to get creative with silhouettes, sunbursts or long shadows.
And unlike some types of photography, you don’t need a professional camera to capture it. With just your smartphone and a few tricks, you can shoot golden hour photography that wouldn’t look out of place in a travel magazine.
So, what time is golden hour? The exact time changes daily and will depend on the weather and your location but, essentially, it’s the hour immediately after the sun has risen and the hour just before it sets. Check your weather app, set an early alarm or delay your dinner plans, and if the forecast is for sunshine, you’re good to go.

Photo: Bella Falk
Golden hour waits for no one. You’ve got about 60 minutes of perfect light that may change or disappear at any time, so it’s vital to plan or you’ll miss it. Apps like PhotoTime or Golden Hour One tell you not only the time and weather forecast for golden hour in your location, but even give you the position and angle of the sun so you can work out exactly where to stand. Scout your location in advance – you don’t want to be scrambling for a viewpoint or still parking your car just as the sky catches fire. Instead, arrive early, find your spot, and then wait for the drama to kick off.
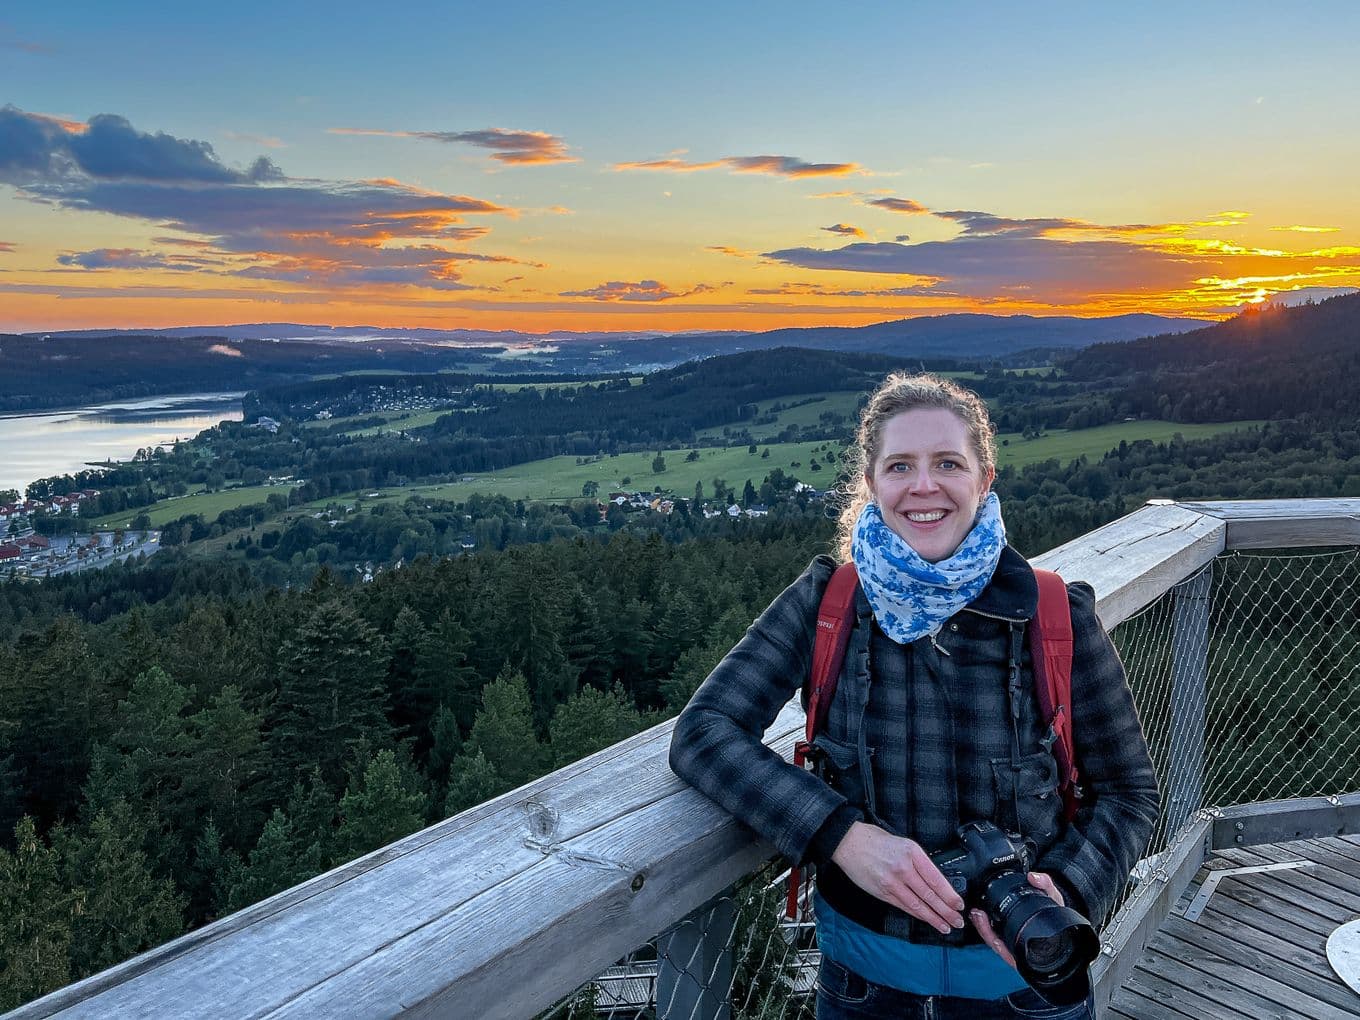
Photo: Bella Falk
Photograph someone in the middle of a sunny day and the harsh glare can be quite unflattering. But golden hour lighting is portrait magic: the warm, angled light reduces strong contrast, evens out skin tone and hides tired eyes better than any concealer.
For the best selfies, especially if you're solo travelling and photographing the moment yourself, face towards the sun and let the light kiss your cheekbones and shine a bright catchlight in your eyes. Or put the sun behind your subject so they’re bathed in a golden backlight that illuminates their hair.
For the best golden hour portrait photography settings, use your phone’s portrait mode to get that dreamy blurry background, and then tap to focus on the eyes. If the person is backlit with the sun behind them, they may appear too dark, so tap and hold on the screen, then slide your finger upwards to brighten.
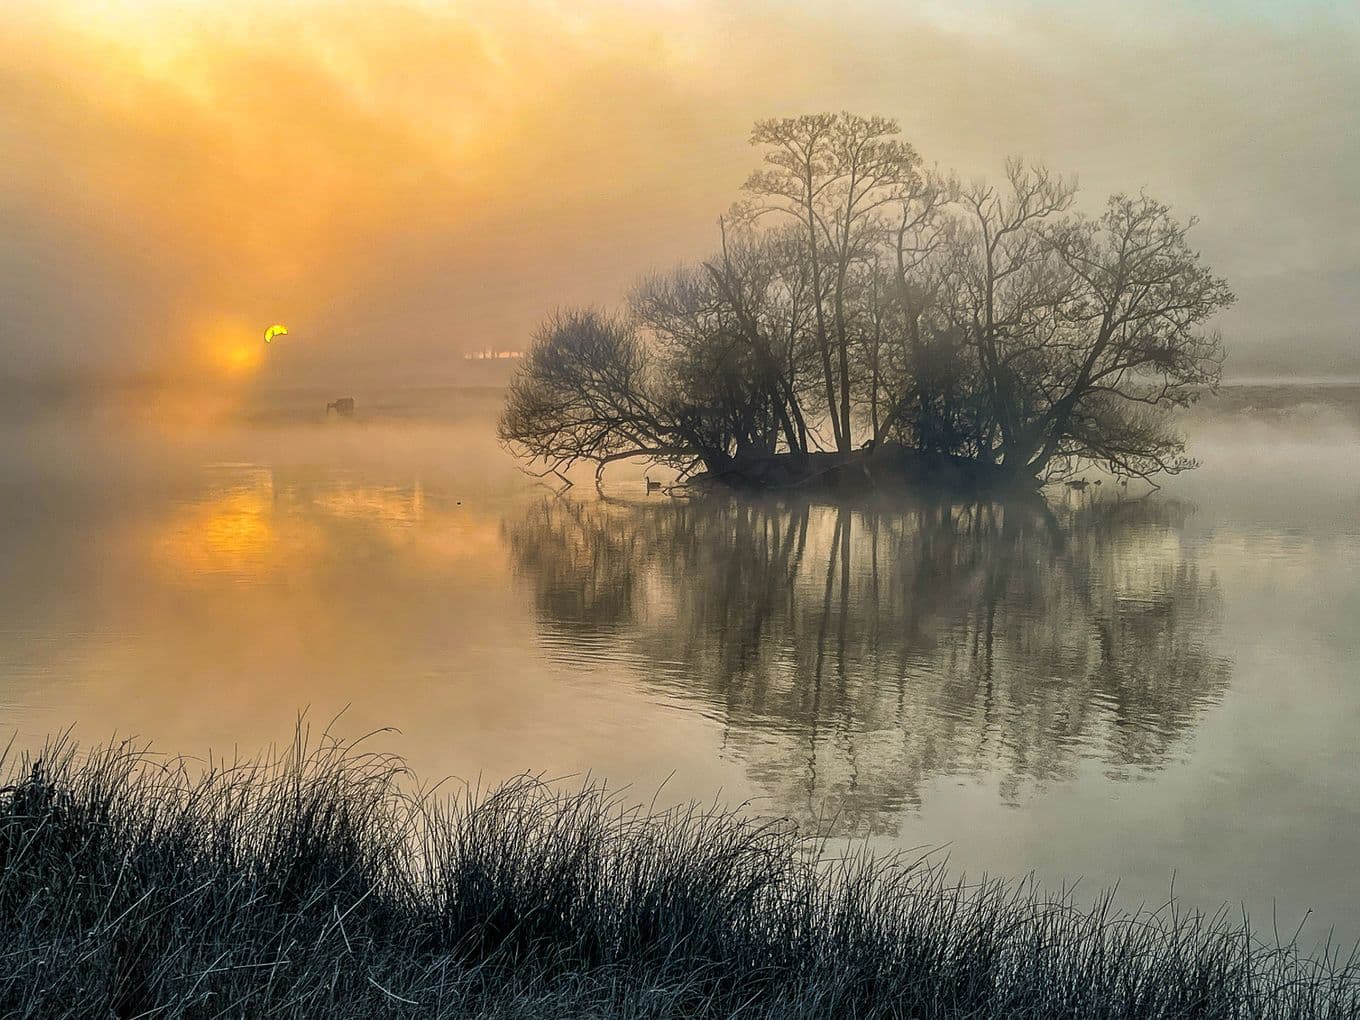
Photo: Bella Falk
Golden hour lighting is beautiful enough, but add water and you get double the magic. Lakes, swimming pools or even puddles turn into mirrors, maximising the impact of your shot. To make the most of it, look for reflections of the sky, trees, people or buildings, and try getting low and close to the water for a different perspective. On calm days, you might get perfect symmetry – try putting the horizon line dead centre to create a mirror image, or zoom in and only photograph the reflection for an artistic optical illusion.

Photo: Bella Falk
How many times on holiday have you found yourself on a west-facing beach, admiring a fiery sky as the sun dips into the sea? But to make your sunset images special, don’t just photograph the empty sea. Instead, try to include something in the foreground that gives a sense of place, such as the silhouette of a person, a palm tree, or a boat.
Tap your screen to focus on the bright sky and your subject will automatically darken. For dramatic effect, shoot low so the foreground shape breaks the horizon. Remember that this won’t be a “one and done” situation – the sky changes by the minute, so try different subjects or compositions to see what works best for you.

Photo: Bella Falk
As the sun sinks, shadows stretch, and you can use this to create imaginative shots. A person becomes a shadow figure twice their height; a fence, a tree or street furniture creates graphic patterned shapes on the ground. Shoot directly into the shadow for depth, or from above to create bold geometry, or try converting the image to black and white to turn the contrasting lights and darks into art.

Photo: Bella Falk
In winter, or in cold climates, morning golden hour takes on a different kind of magic. As first light begins to warm the day, frost coats leaves in a sugary layer and icy crystals sparkle. Low-hanging mist creates a soft filter, and the warm light cuts through the blue chill. But these effects fade quickly as the sun rises, so you need to work fast. Dress warm and get out before the sun peeks over the horizon. Look for backlit fog, shimmering ice or the first light catching snow. Tap to focus on highlights and manually lower the image brightness to avoid burning out the frosty whites.

Photo: Bella Falk
Another advantage of sunrise golden hour, especially in the summer, is that you’ll have the place to yourself. Drag yourself out of bed before dawn and the chances are that most of your fellow travellers will still be in bed. The streets are quiet, beaches are washed clean by the tide and even the most famous landmarks will be crowd-free.
That stillness translates into your photos. You can centre a shot, shoot wide and take your time without dodging tourists. Plus, there’s something peaceful and magical about being the only one awake to witness the world slowly lighting up.
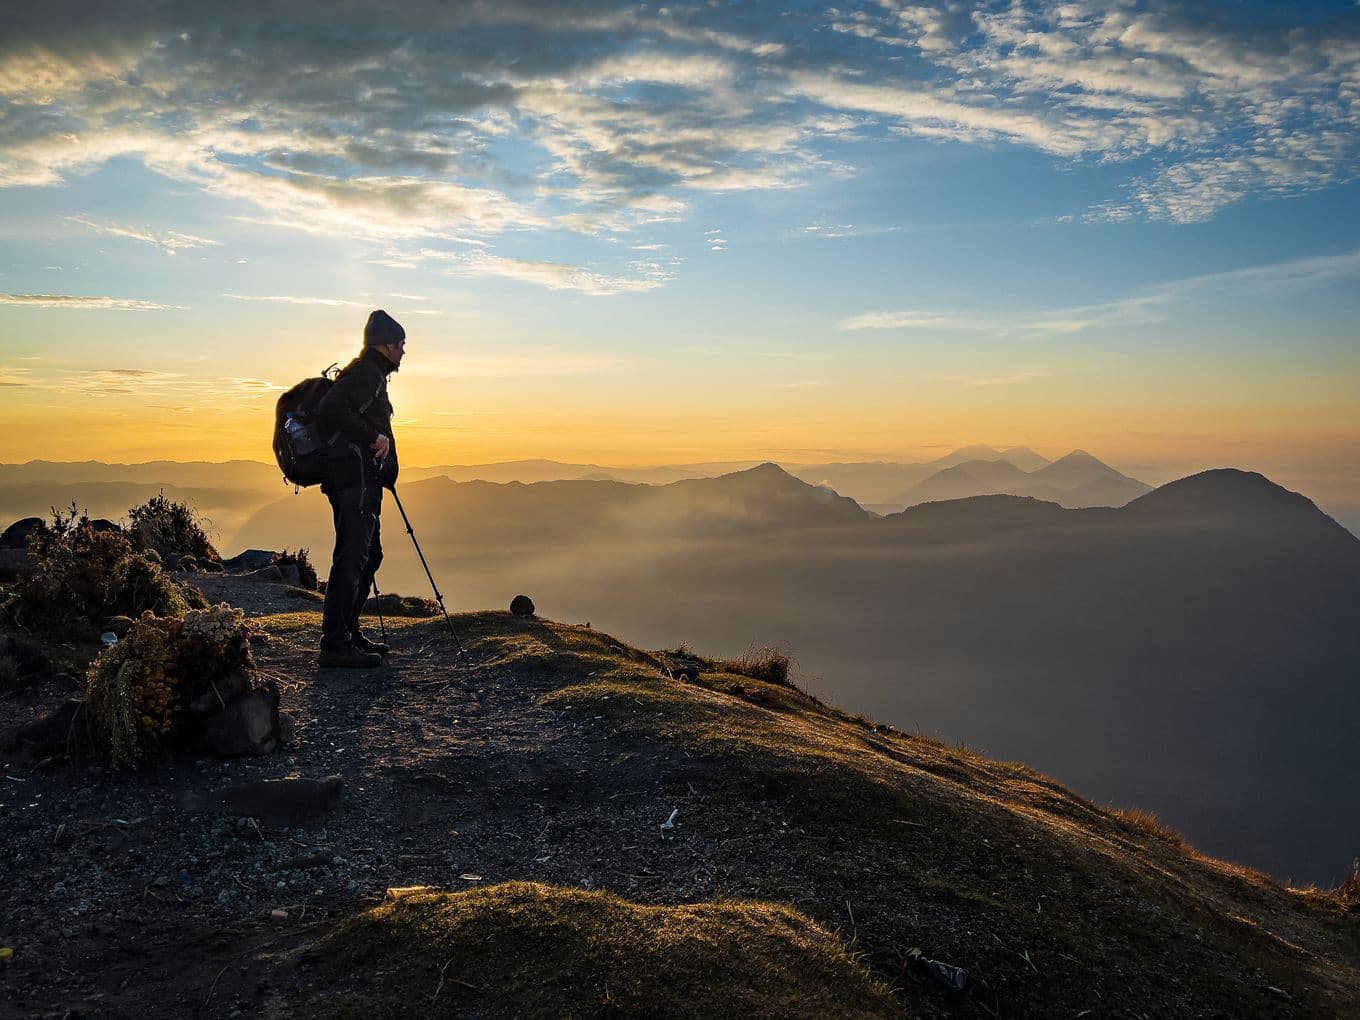
Photo: Bella Falk
With the low angle of the sun come masses of opportunities to play with the light and get creative. Rim lighting, where you get a soft glow outlining your subject, happens when the sun is directly behind them. It’s great for furry animals and illuminating hair or anything with texture. Shooting towards the sun can create dreamy, ethereal vibes, especially when your subject is backlit or there’s mist or dust in the air. Or try embracing sunbursts: position yourself so the low sun is partially peeking out behind a building, a tree or a person, and then use the burst mode or Live Photos to catch just the right flare.

Photo: Bella Falk
It’s surprising how many people pack up and leave the second the sun’s dipped below the horizon. But stick around, because the show may not be over yet – some of the best golden hour photoshoot moments come in the afterglow. The sky keeps changing, and if you’re lucky, you may get a late burst of fiery glory as the dying sun ignites the clouds from underneath. This is the start of what’s known as blue hour, when city lights turn on but there’s still indigo in the sky. Try using your phone’s night mode to capture the scene, or use Live mode to shoot a burst, and then choose the long exposure setting to blur car headlights into streaks.
Photo: Bella Falk
Even golden hour photography benefits from a light polish. Use your smartphone’s built-in editor to crop out distractions, level horizons and fine-tune the exposure. If you have a “pro” phone that shoots RAW files, turning this setting on will allow you to make edits without losing image quality. Bump up the warmth a little to bring out that sun-kissed glow, or increase the blacks to deepen silhouettes, but resist the urge to overdo it. Oversaturated skies will make your sunset look cheesy and fake. Instead, aim for edits that enhance what was already there and fix imperfections to make the scene look its best.
Discover memories faster with exclusive features like facial recognition and smart albums.