Photography
How to take black and white photos on iPhone
From moody filters to unexpected grain, this guide makes black and white iPhone photography easy. Real tips from a pro
Photography
From moody filters to unexpected grain, this guide makes black and white iPhone photography easy. Real tips from a pro
This guide is brought to you by Dan Mold – a Cambridgeshire-based, prize-winning photographer and author with over 13 years of photojournalism experience. Dan is also a former Adobe-certified Photoshop guru, so you know his tips are worth trusting when it comes to getting the most out of your images.
Black and white photography is a classic and timeless style that lends itself well to many genres with its clean, minimalist look, so there are plenty of reasons to try it out. The process for shooting in black and white is largely the same across iPhone models, as they all run on Apple’s iOS and the latest iPhones share many of the same features.
All iPhones come with Apple’s default Camera app, which I’ll focus on here. That said, there are also third-party apps – such as Adobe Lightroom Photo Editor – that offer more advanced controls for B&W photography, especially during editing. I’ll cover some of those options later in the article.
Before shooting, open the Settings app on your iPhone, scroll down to Camera, and tap it to access advanced features. Here, you can:
Enable ProRAW and Resolution Control to shoot high-quality, editable image files.
Activate the Grid or Level for better framing and alignment.
Set your Video Format to higher resolutions, such as 4K, for enhanced video quality.
While ProRAW gives you maximum image quality and editing flexibility, it doesn’t let you apply B&W filters at the time of capture. It’s ideal if you plan to convert to black and white later during editing. However, if you want to compose your photo directly in monochrome, it’s simpler to shoot in a non-RAW format like JPEG or HEIF – the default format on iPhones.
For this, I used an iPhone 14 Pro, but these steps should be similar across most iPhone models, as the Camera app remains largely consistent.
Open the Camera app and ensure you’re in Photo mode.
Swipe up on the viewfinder (or tap the small arrow at the top centre of the screen) to reveal additional settings.
Swipe across the bottom menu to the Effects button and tap it.
Scroll through the filter options, which include colour filters like Vivid Warm and Dramatic Cool, until you reach the three black and white options:
Mono – a flat, neutral look with consistent, even grey tones. It’s subtle and works well for everyday scenes.
Silvertone – adds a slightly cooler, silvery tint with more contrast than Mono. Great for moody landscapes and urban scenes.
Noir – delivers a strong, high-contrast image with deep blacks and bright highlights. Perfect for bold, graphic compositions or a dramatic, film-noir aesthetic.
These B&W filters can be applied live, meaning you can compose your shot in black and white and see how it will look in real time. This makes it easier to judge contrast and composition on the spot.

Normal

Mono

Silvertone

Noir
Once you’ve selected a B&W filter, you can refine your image using the iPhone’s built-in controls:
Zoom and Macro:
On iPhone 14 Pro, you can toggle between 0.5x, 1x, 2x and 3x zoom levels.
If your subject is close to the lens, tap the Macro icon (usually a small flower or leaf symbol) to activate macro mode and ensure sharp detail.
Exposure:
Swipe through the bottom control panel to find Exposure, then swipe left or right to brighten or darken the image.
Alternatively, tap on your subject to set focus, then slide the sun icon up or down to adjust brightness manually.
Contrast and Picture Styles (available when not shooting in ProRAW):
Swipe up again to open the Picture Styles menu.
Choose from styles like Rich Contrast, which adds depth and definition with stronger tonal separation; or Vibrant, Warm or Cool, which subtly shift the tonality of your image and can affect how your B&W filter renders.
You can also adjust Tone and Warmth sliders to fine-tune the final look.
If you’re prioritising the highest image quality, consider sticking with RAW format and adjusting contrast later in post-processing.

Zoom and Macro

Exposure

Rich Contrast
Portrait mode on iPhone offers powerful tools for black and white photography – especially when combined with its built-in lighting effects.
Open the Camera app and swipe to Portrait mode.
Although you can swipe up and apply Mono, Silvertone or Noir, this approach bypasses Portrait Mode’s enhanced lighting features.
For the best monochrome portraits:
Tap Natural Light (displayed at the bottom of the screen).
Swipe through the available options until you find Stage Light Mono, which isolates your subject on a pure black background, giving the look of a studio spotlight; or High-Key Mono, which creates a bright, airy portrait with your subject on a clean white background. Ideal for fashion or editorial-style shots.
After selecting one of these, swipe up again to access key controls:
F-setting (aperture control) – lets you control the depth of field. A lower F-stop (eg f/2.0) gives a more blurred background, while a higher F-stop (eg f/16) keeps more of the scene in focus.
Exposure – adjust brightness by swiping left or right on the Exposure bar.
Also available: Flash (usually best left off for natural light shots) and Self-timer, handy for self-portraits or hands-free shooting.
These modes not only shoot in black and white but also create realistic depth-of-field effects, allowing you to make detailed adjustments even after capture.

Natural Light

Stage Light Mono

High-Key Mono

Experiment with lighting effects to create clean, editorial-style portraits
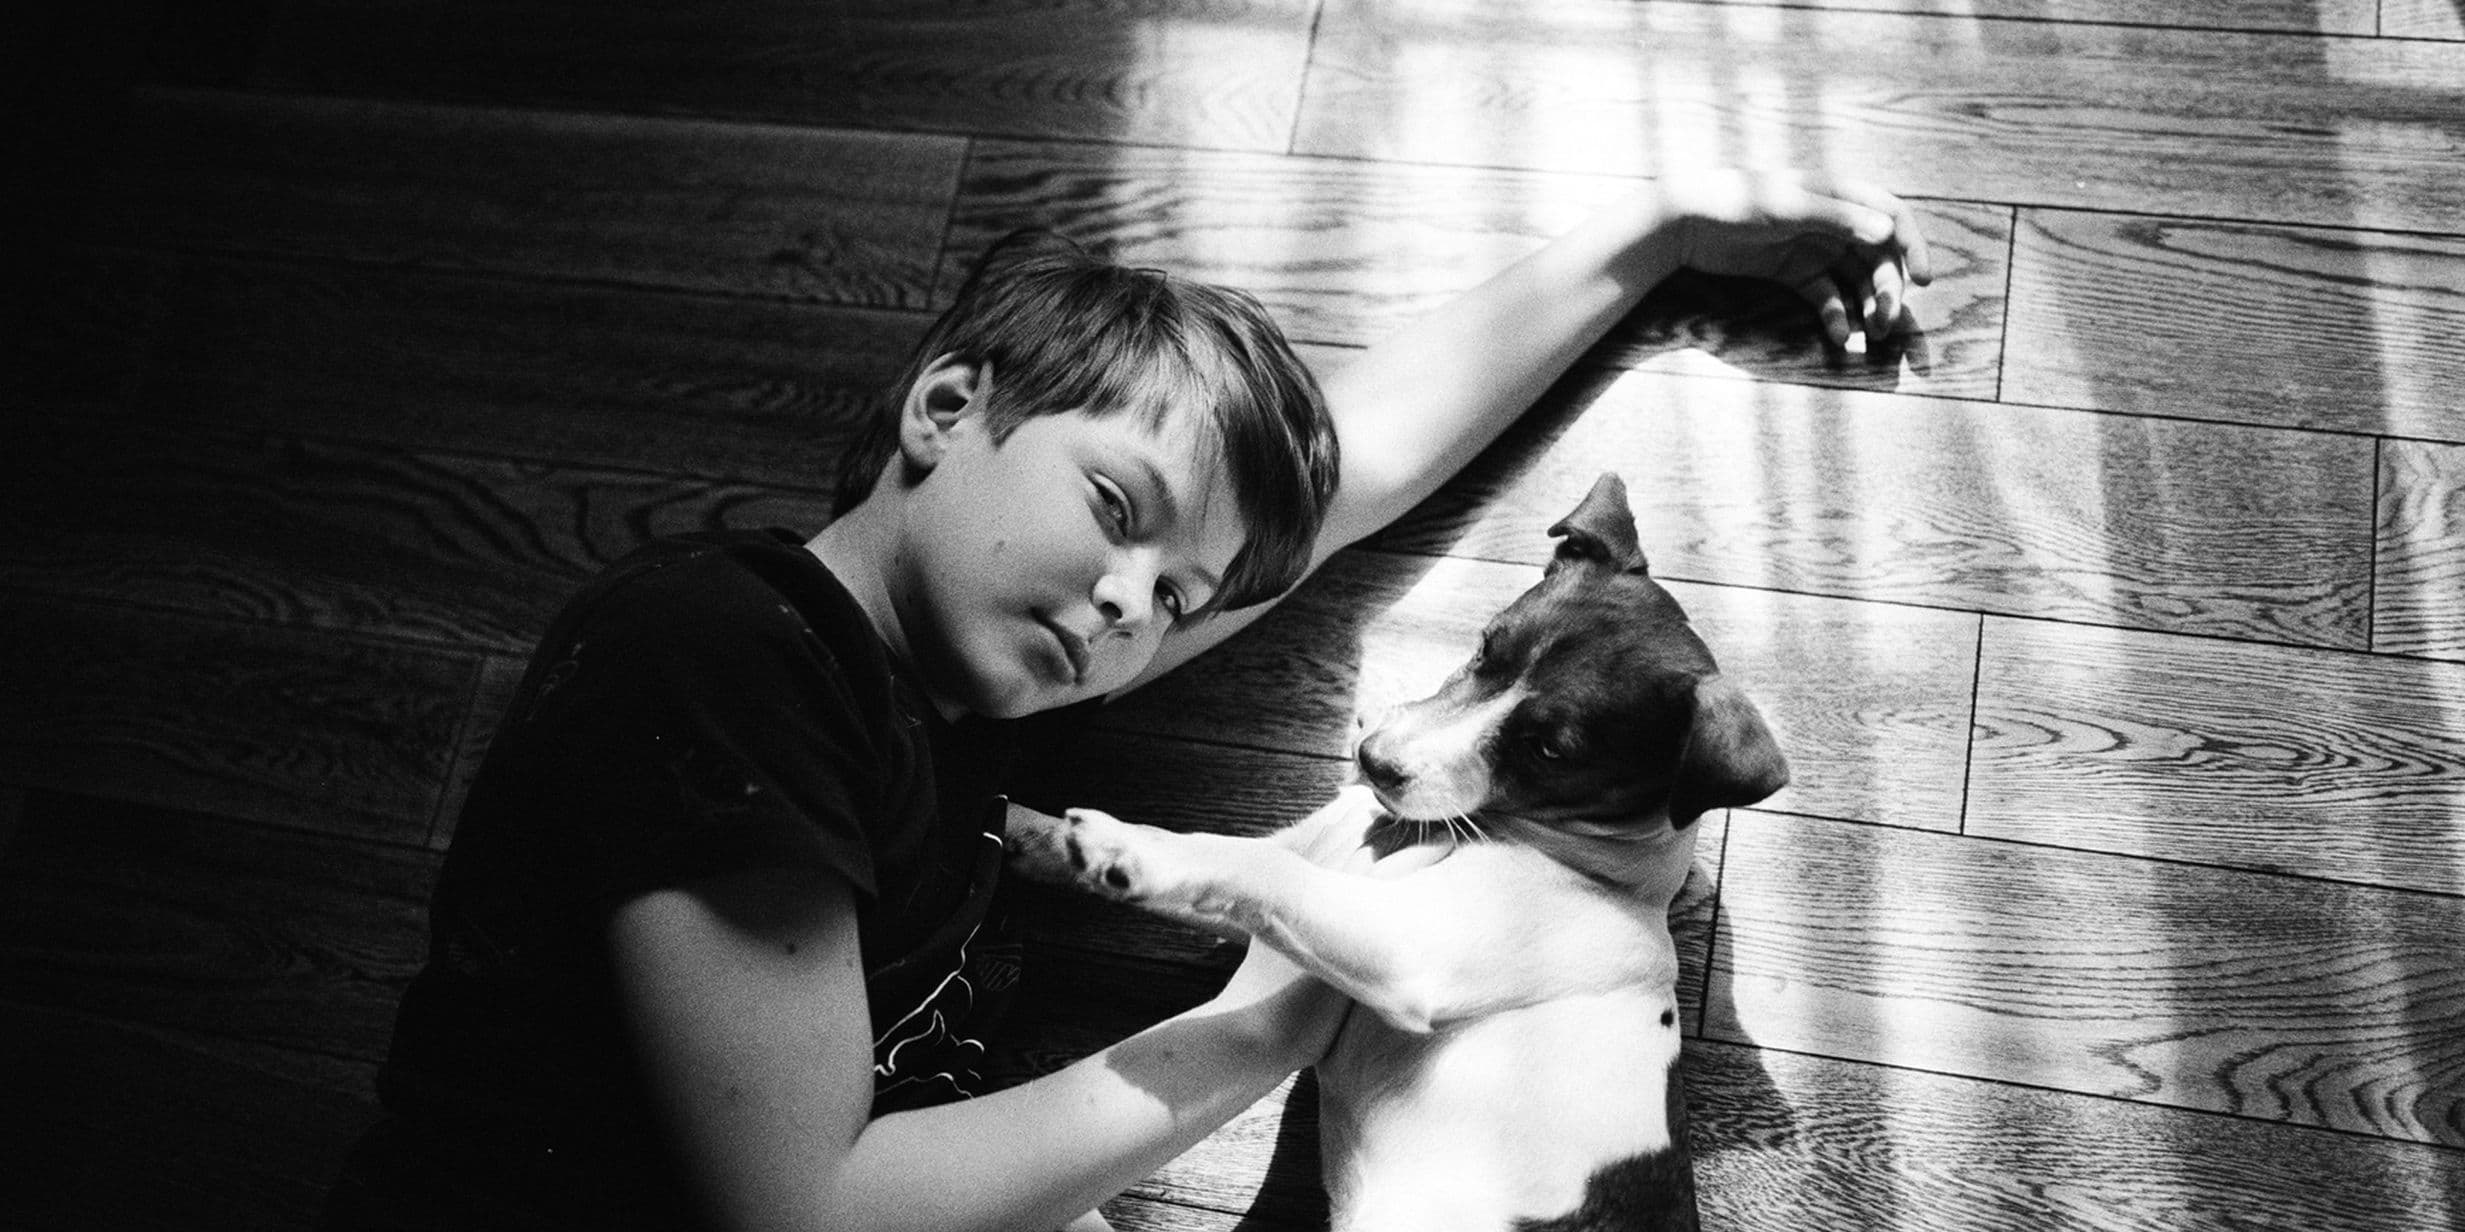
Black and white photography excels when the scene is simplified. Use it to strip away distractions and draw attention to form, light and structure.
Use a single focal point to create a clean and uncluttered composition.
Try the rule of odds: odd numbers of subjects (like 1, 3, or 5 trees) often feel more balanced than even numbers.
That said, don’t be afraid to break the rules. Strong symmetry with just two subjects can be equally compelling, especially in architectural or urban scenes.
To improve composition:
Turn on the Grid:
Open the Settings app, go to Camera, and toggle on Grid under Composition.
This enables a 3x3 overlay in the viewfinder, helping you align horizons and verticals precisely.
Use leading lines:
Look for elements like railings, fences or paths in your composition that guide the viewer’s eye towards your subject.
In black and white, these lines can become especially striking when bright lines contrast with darker areas of the image.

Using leading lines to improve composition
Apple’s latest iPhones use two AI-powered image processing systems: Smart HDR (introduced in 2018) and Deep Fusion (2019). At the time of writing, there’s no native way to disable this processing, meaning your images will automatically be enhanced – optimising for detail, texture and reduced noise.
This can be useful, but as we sometimes want a little digital noise in B&W photography to add a grainy charm, it’s a shame that Apple smooths it out. If you’d like to retain or add more grainy texture to your photos, you have two main options. First, use third-party camera apps such as ProCamera or Halide Mark II. ProCamera bypasses Apple’s processing and gives you greater manual control over shutter speed and ISO. Alternatively, let your iPhone process the image as normal, then add texture afterwards using an editing app such as Darkr – Vintage Film Filter, which is great for applying film grain effects.
Lightroom Photo Editor
Lightroom is a powerful photo editing app that can sync with Lightroom Classic on your desktop. This means photos edited or taken on your iPhone can be seamlessly fine-tuned later on your main computer. It also offers a wide range of presets for quickly applying your favourite monochrome styles.

Lightroom Photo Editor
Hipstacam Free: Black & White
Not to be confused with the similarly named HipstaCam (which gives your friends a hipster makeover), Hipstacam Free: Black & White is a quick and easy app for applying over 70 effects and adjustments. These include sepia, invert and noir-style filters – great for fast edits.

Hipstacam Free: Black & White
BLVCK – Black and White Effect
BLVCK is free to download from the Apple App Store, with additional features available via in-app purchases. It boasts a sleek interface and offers more than 50 black and white filters, plus the ability to add grain, dust, light leaks and creative borders for extra depth and personality.

BLVCK – Black and White Effect


