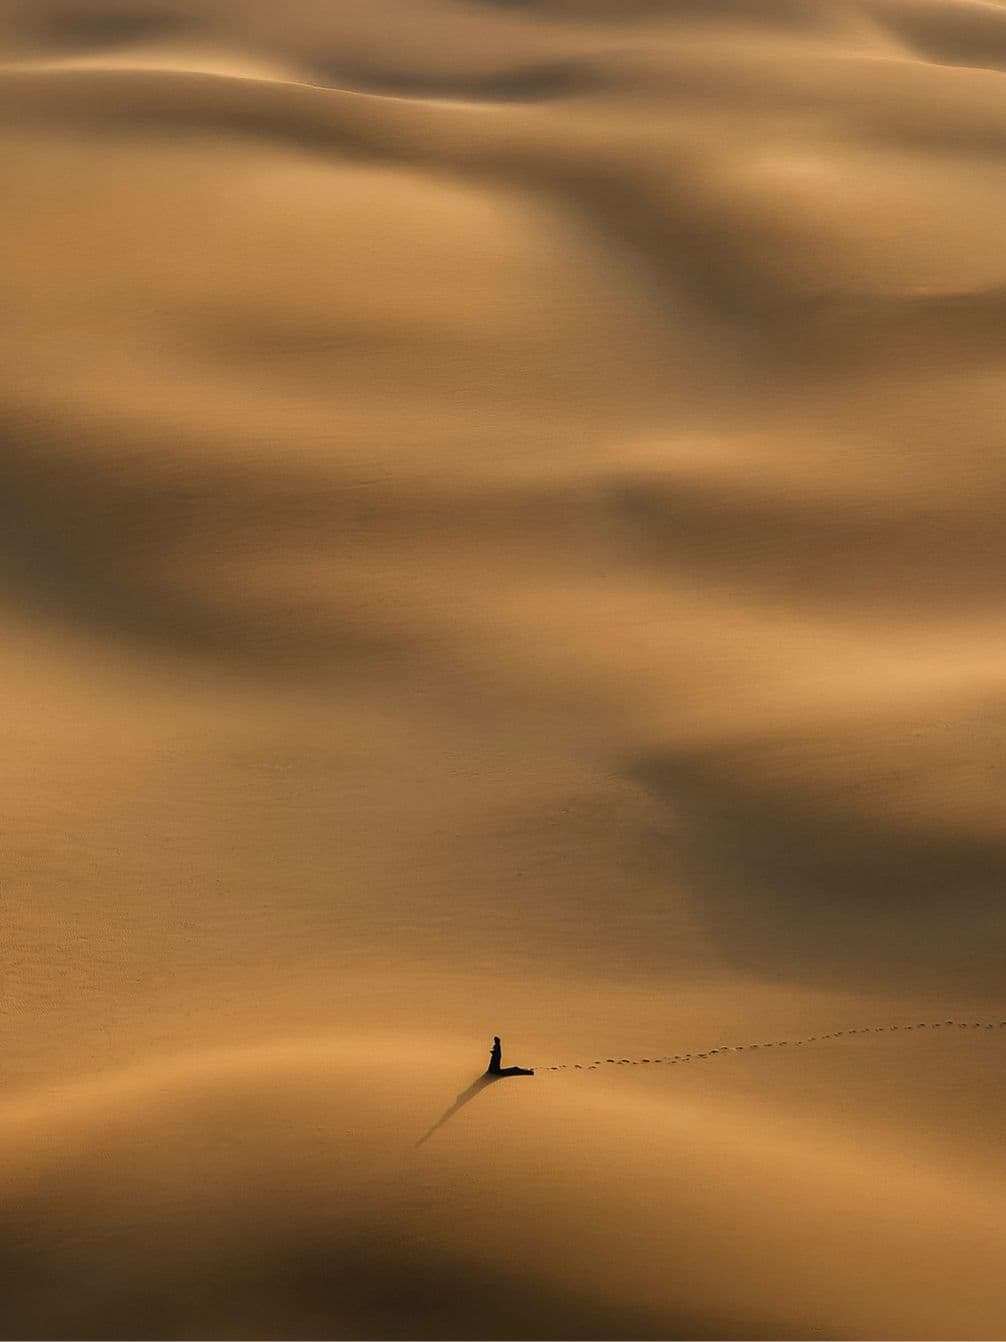
Stand on Portugal’s Algarve coast and you’ll see postcard-perfect vistas; ask Mathias Fernandes to photograph it and the shoreline turns into an architectural study.
Where many drone hobbyists chase novelty, Fernandes seeks narrative. The region’s resident drone photographer stitches moments of human scale – a lone figure, a borrowed 1960s coupé – into vast tableaux that render the coast’s ancient geology both grand and strangely intimate. His photography feels contemplative and almost painterly, reminding us that technology’s newest toy can still serve an old purpose – evoking wonder.
His methodical pre-flight rituals and insistence on depth – both literal and emotional – offer a masterclass in combining tech with craft. Here, he unveils how to tame wind, how to turn a cliff face into a canvas, and how to see a familiar coastline as if for the first time.

Photo: Mathias Fernandes
What first drew you to drone photography?
The idea of having a camera in the air instantly fascinated me. I loved the thought of capturing landscapes from perspectives that the human eye cannot reach on its own. I also quickly realised that a drone would allow me to truly do justice to the verticality of the Algarve’s dramatic landscapes. Being able to showcase those towering cliffs, sea stacks and intricate rock formations from above opened up an entirely new creative world for me.

Photo: Mathias Fernandes

Photo: Mathias Fernandes
What makes a standout drone image?
Depth – as in any other type of photography – is key. Knowing how to create depth and pairing it with an epic location makes everything stronger. With a drone, I have explored many different approaches, from very high and wide perspectives to very close and minimal compositions. There isn’t a single formula for a great shot, but if I had to pick one element that consistently makes a drone image stand out, it would be the sense of depth.
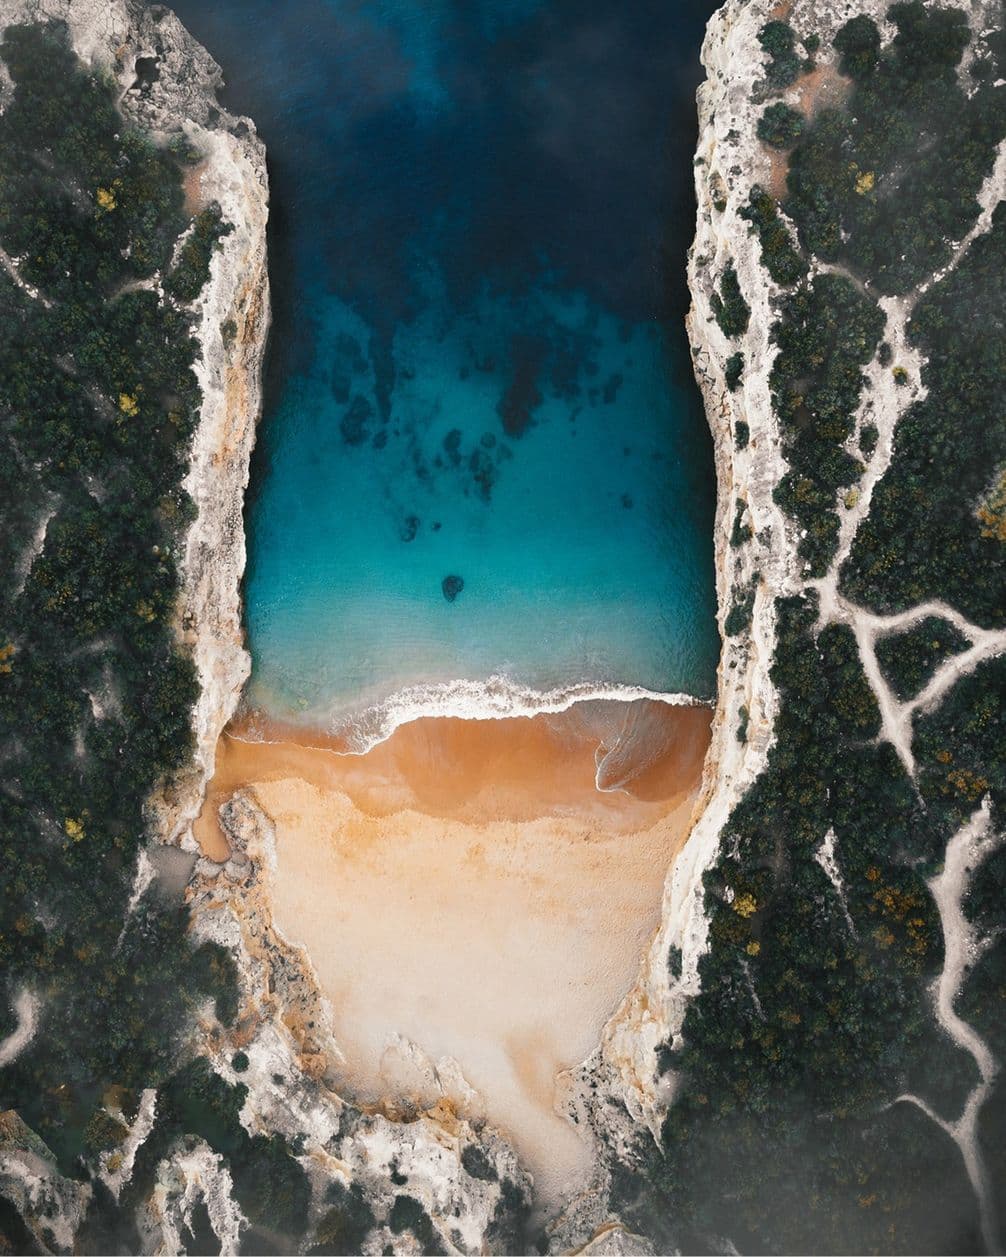
Photo: Mathias Fernandes
What makes a good drone photographer?
In many ways, it is the same as being a good photographer with any camera. The drone is just the tool, the vehicle for the creative vision you want to express. Intention will take a photographer a long way. But of course, preparation is key. Lots of training, knowing your equipment inside out, and being familiar with local rules and laws are essential. Flying a drone is complex, and the more you eliminate external friction, the more you can focus on translating your ideas into strong images.
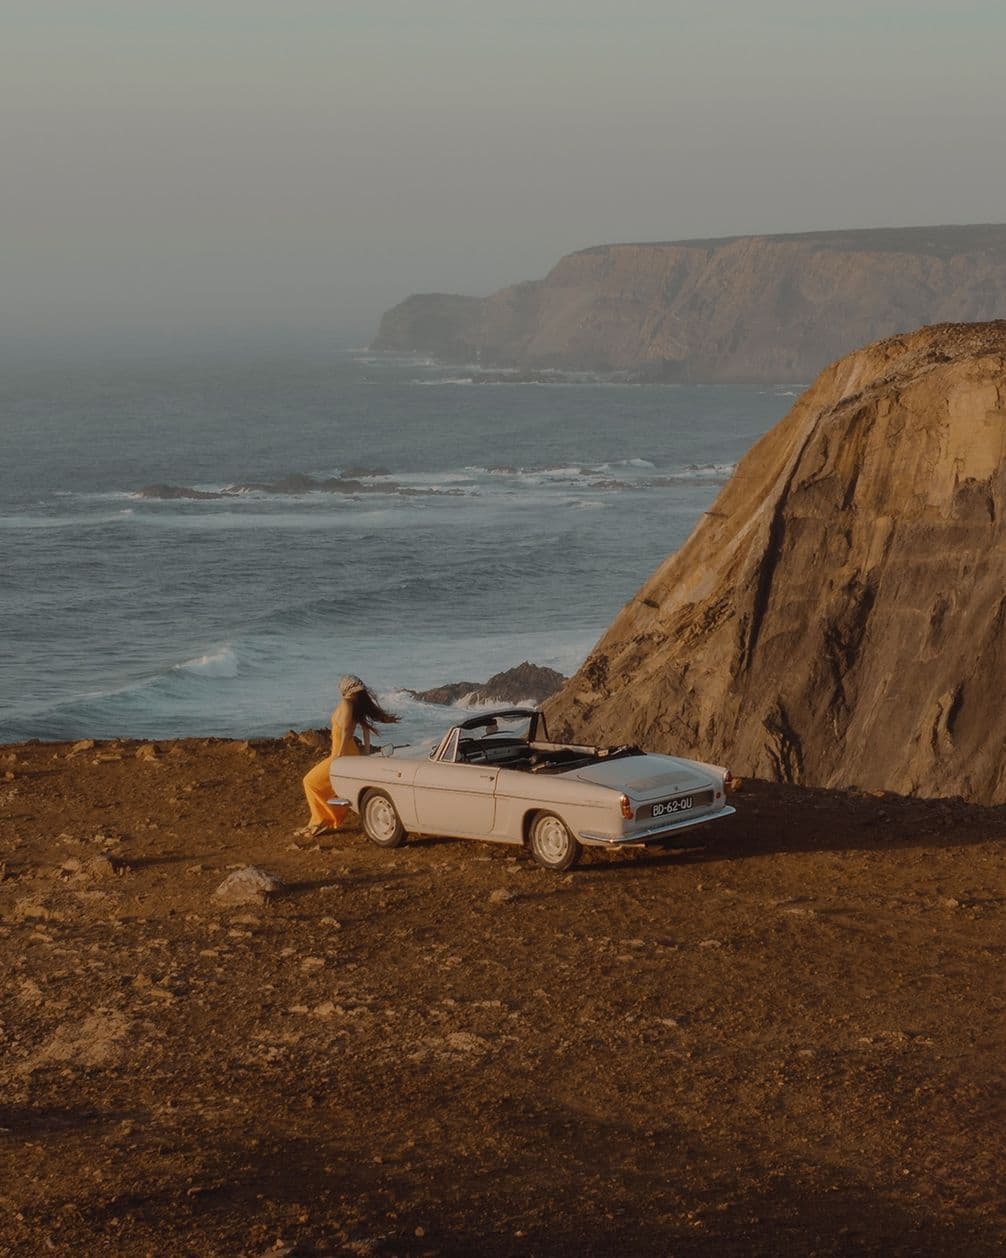
Photo: Mathias Fernandes
Can you share the story behind your favourite shot?
It was a concept I had in mind for a long time, and in 2024 I finally had the chance to bring it to life. A group of friends came over to the Algarve for a week to spend time together and create. Every year I try to organise these kinds of gatherings, and this time I managed to borrow a classic car and one of our friends modelled for the scene.
We drove out to the west coast to bring the whole vision together, and the final result turned out exactly how I had visualised it. What I love is that it looks like a normal photo, not a drone photo, but it was actually captured from the air. Everything fell perfectly into place – the colours, the light, the perspective. I am a big fan of classic cars and of the Algarve coastline – this image brings together both of those passions.

Photo: Mathias Fernandes
Photo: Mathias Fernandes
What’s your biggest challenge on a typical shoot?
Challenges can take many forms depending on the shoot. Sometimes it is unexpected weather changes, sometimes it is people unintentionally walking into the frame. Most of the time, these challenges are things I simply cannot control, which is why I always put a lot of effort into pre-production, doing as much preparation as possible to reduce potential friction during the shoot. But when something unexpected does happen, I try to absorb it and turn it into an asset. I see it as part of the creative process, and I aim to dissolve the challenge by embracing it and finding ways to integrate it into the shoot. Even with changing weather or other surprises, I always try to extract something positive and bring it into the final work.
What photography equipment can’t you live without?
Of course, the drone itself is essential. Then, spare batteries are a must. I like to fly a lot and make the most of the time while the camera is in the air. Sometimes I will use the first battery just to scout around, explore perspectives and angles, and then use the remaining batteries to actually execute the planned shots, whether for photos or video.
I always carry a lens cleaning cloth to make sure it’s spotless before take-off. The last thing you want is to capture a full set of images only to realise the lens was dirty. Extra propellers are always in my bag, too, because you never know. I also use an app on my smartphone to track weather conditions, especially wind speed, to make sure it is safe to fly. And for video work, I carry ND filters to control exposure and get smoother footage.
Photo: Mathias Fernandes
What are your tips for novices who want to level up quickly?
First of all, as an overall photographer, it is important to train your eye. Learn to see things differently, to look at a scene and start building a story or a composition even out of simple or mundane subjects. You can practice this with any camera at first; it does not need to start with a drone. Once you build a strong sense of composition and storytelling, you can then apply those principles to drone photography.
When it comes to actually flying, the first priority is to master the skill of maneuvering the drone itself. Spend plenty of time practicing flight control and getting comfortable with how the drone moves and reacts to your commands. In the beginning, focus on flying rather than creating photos or videos, so you build confidence in handling the drone in different situations.
Once you feel comfortable flying, start getting creative. A good way to approach it is to choose open obstacle-free locations for your first creative flights. Before flying, try to envision the shots you want to create – you can sketch them out or look for reference photos online to inspire you. Having a plan before take-off helps you stay focused, avoid wasting battery time, and give you confidence while flying because you know exactly what you want to capture.
Photo: Mathias Fernandes
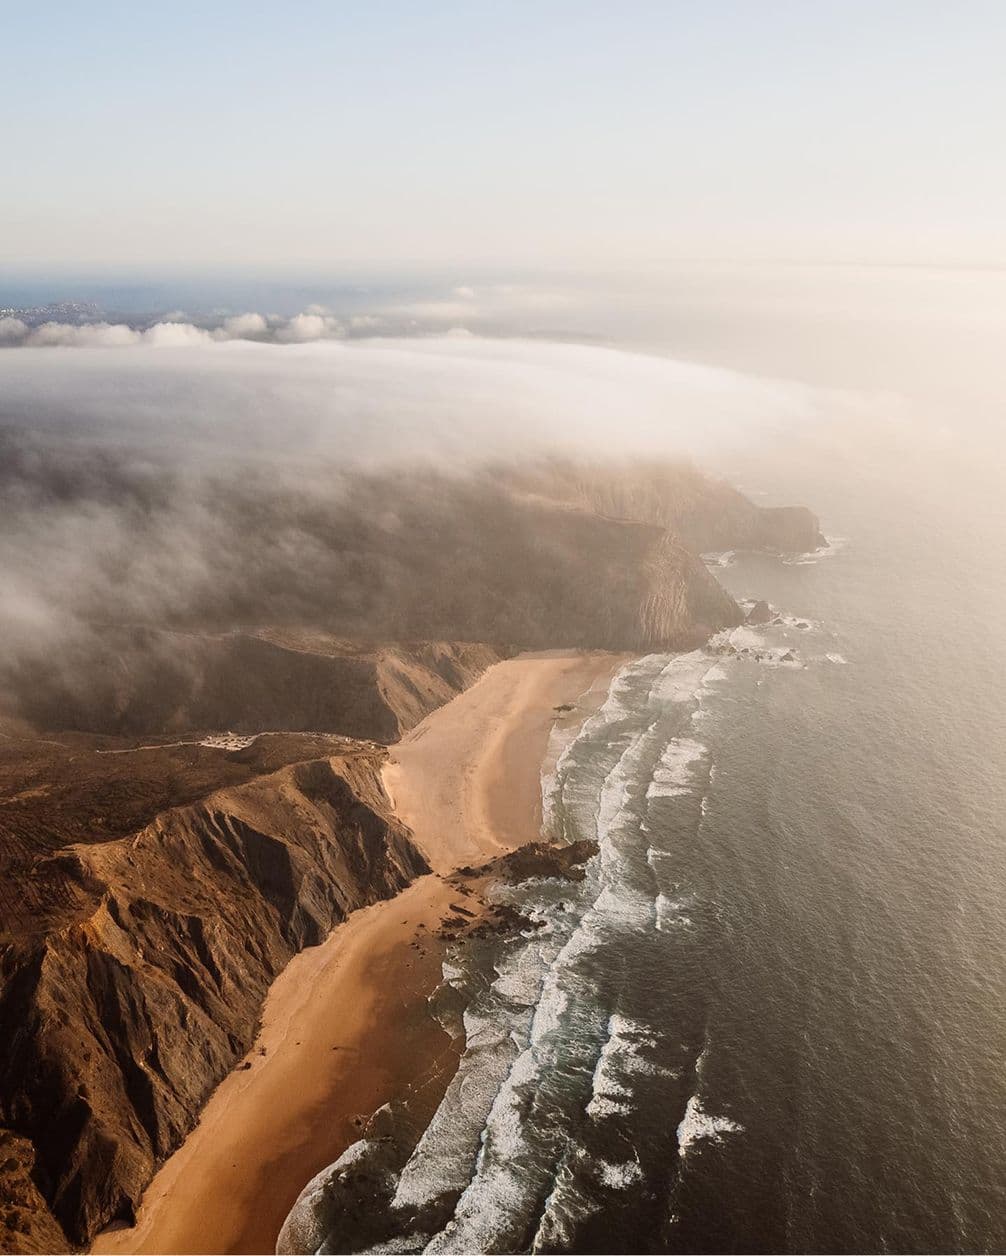
Photo: Mathias Fernandes
What’s on your pre‑flight checklist?
First, I always check the weather forecast, especially wind strength and wind direction as those factors have a huge impact on safe flying. Then I verify that I have all the required paperwork, permits or authorisations necessary to fly in the specific area, to ensure I am operating legally. Before take-off, I check that the area is safe, making sure there are no large groups of people around and that my take-off and landing zone is wide, stable and free of obstacles. This includes being aware of nearby trees, power lines, buildings or birds that could affect the flight.
From a technical standpoint, I make sure the drone’s firmware, controller and app are all updated, and that the batteries are fully charged and functioning properly. I calibrate the drone’s compass if necessary, check for any system warnings and confirm GPS signal strength. I also check that the return-to-home altitude is properly set in case an emergency return is needed during the flight. Lastly, I mentally review my flight plan, considering both my creative goals and safety margins, so I can stay focused and prepared once the drone is airborne.
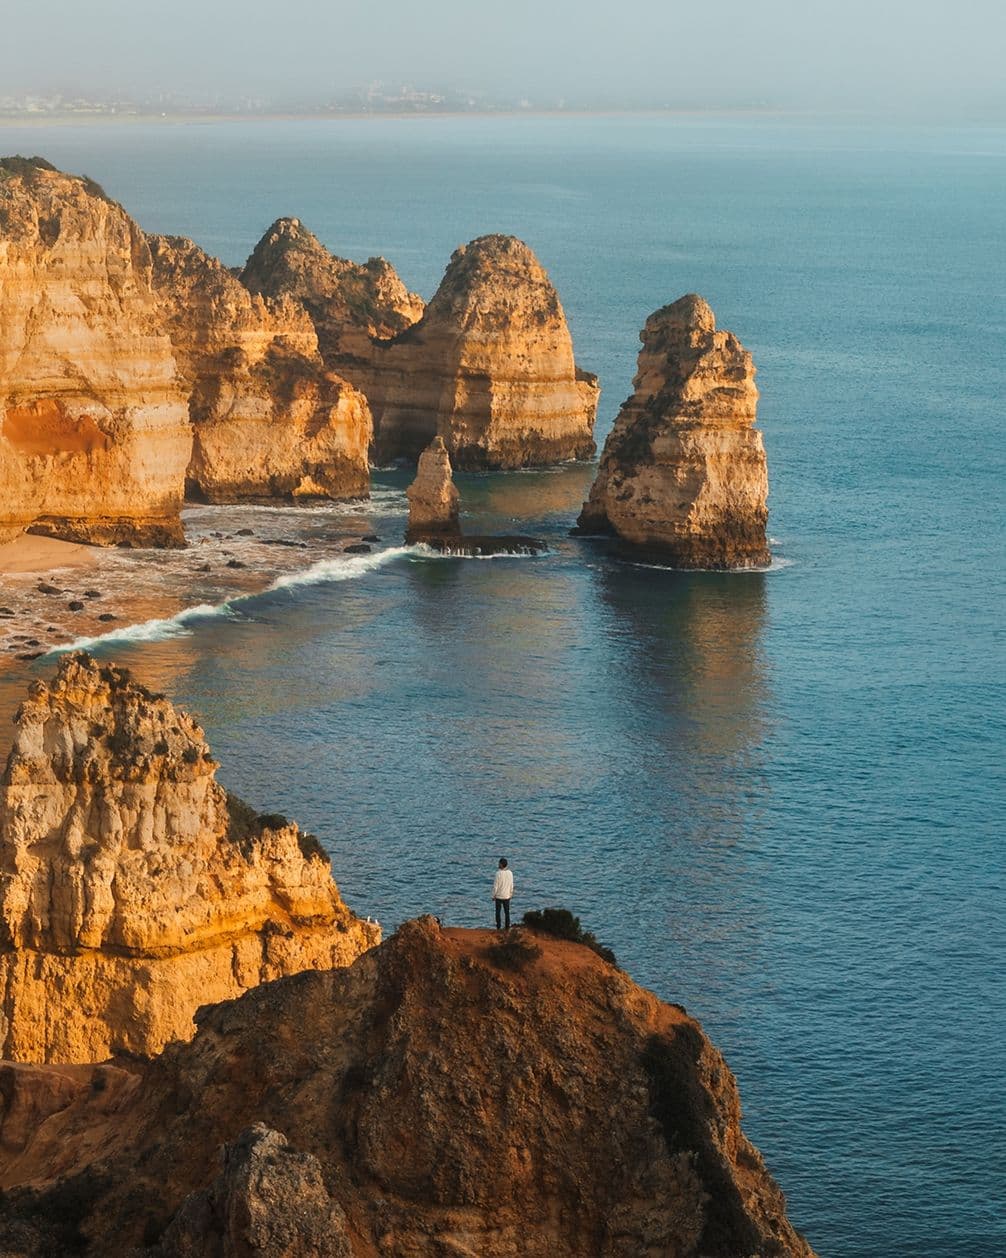
Photo: Mathias Fernandes
You’re famous for cliff‑edge reveal shots. How do you keep safe?
Safety always comes first. If I am creating a shot where either myself or a model appears to be standing on the edge of a cliff, I always make sure to lift off the drone from a safe location far away from the cliff itself, where there is plenty of open space for a safe take-off and landing.
As for the subject in the frame, we never actually stand at the very edge. The person is positioned as close as safely possible, while still leaving a good distance from any dangerous drop. Then, to create the illusion of being right at the edge, I use compression, which happens when using longer focal lengths on the drone’s camera. By zooming in, the background appears visually closer to the subject, and the space between the foreground and background is compressed into a flatter perspective. This makes it look like the person is standing right at the cliff edge, even though there are still several metres of safe ground in front of them.
Which drone‑camera spec matters most for stills and why?
I chose the Mavic 3 Pro because it offers a large, high-quality imaging system – perfect for both video and photo work, including large prints. Its main camera features a 4/3″ Hasselblad CMOS sensor that captures 20 MP stills and records 12-bit RAW, providing wide dynamic range and excellent low-light performance. Larger sensors like this naturally produce less noise, richer colour depth, and more latitude for editing.
The Mavic 3 Pro also leads in dynamic range for a consumer drone – about 12.8 stops – which helps preserve subtle highlights and deep shadows, and is great for landscapes and dramatic skies. Another standout feature is its triple-camera setup: a 24mm wide-angle, a 70mm mid-tele, and a166 mm telephoto. This means I can switch focal lengths without landing, letting me capture everything from sweeping vistas to compressed, intimate details – all in one flight.
In short: sensor size (4/3″) for better image quality, low noise and bigger prints; dynamic range for flexible editing and richer visuals; multiple focal lengths for unmatched creative versatility. That is why the Mavic 3 Pro stands apart – it gives me the technical performance I need without needing multiple drones or lenses.
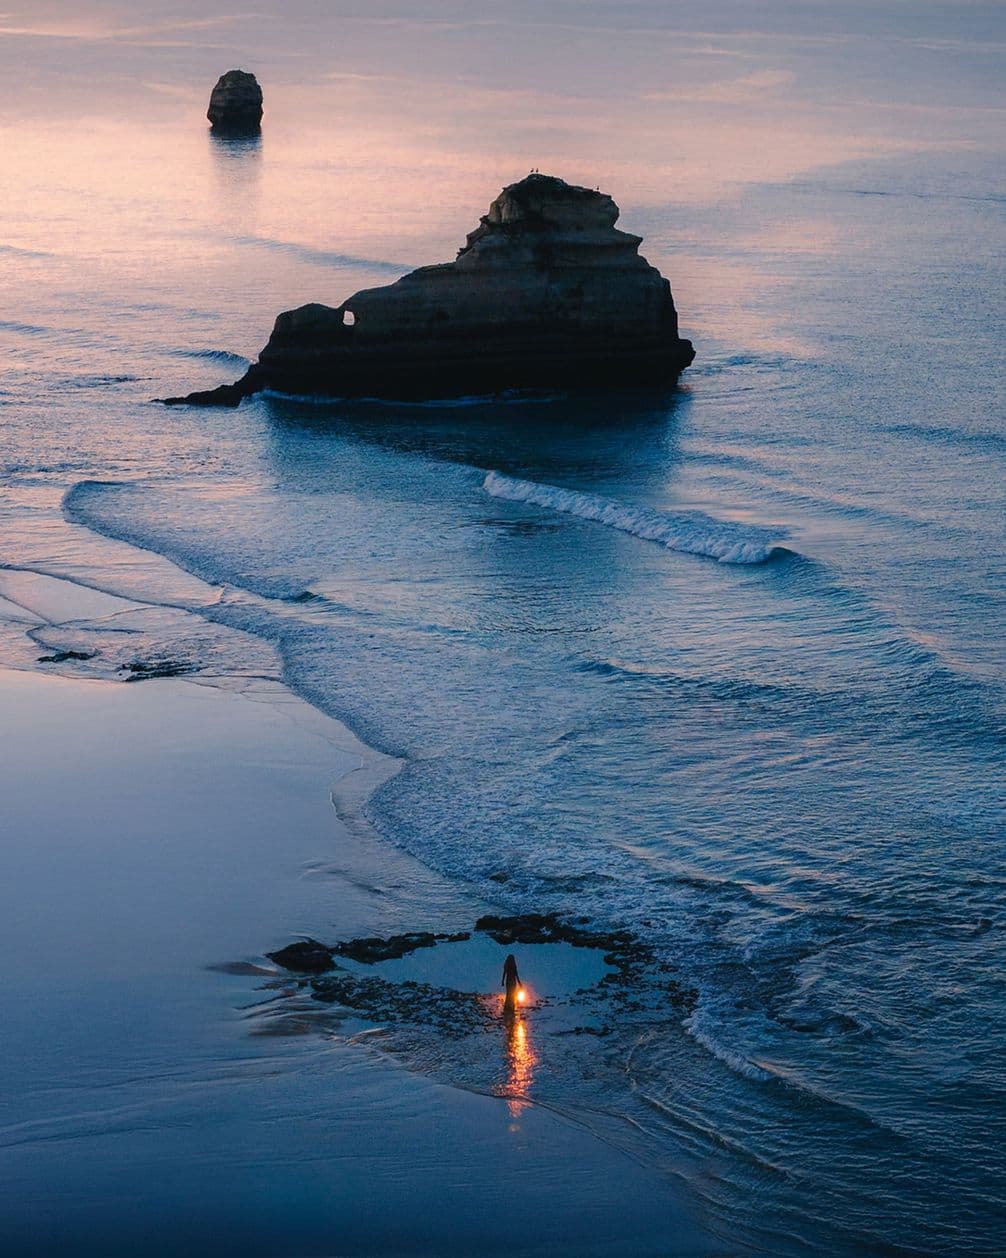
Photo: Mathias Fernandes
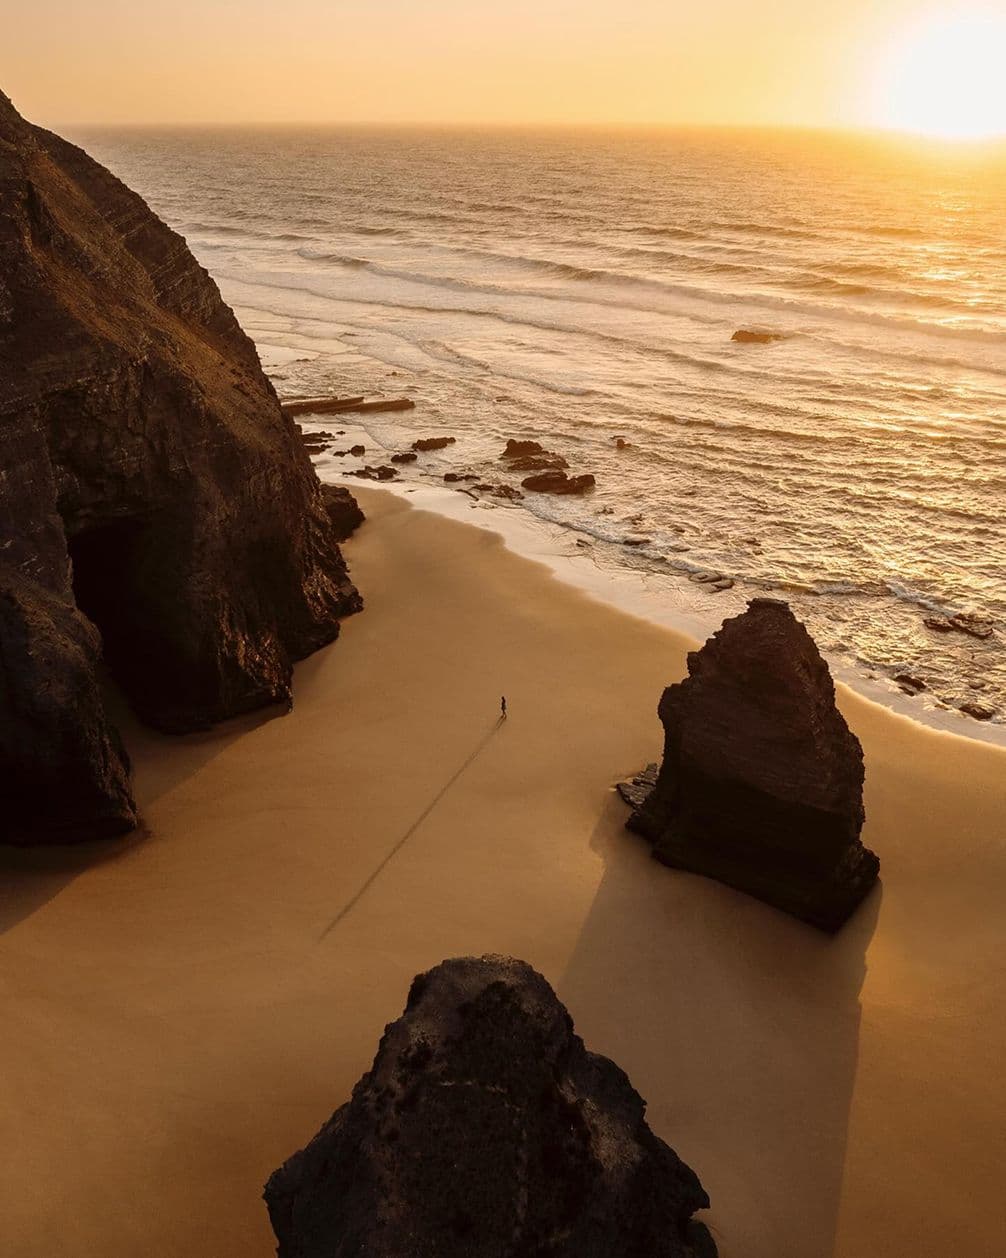
Photo: Mathias Fernandes
How do you colour‑match drone and ground images so viewers don’t see the seam?
Nowadays, most cameras do a pretty good job of matching colour science straight out of the device, which makes things much easier. However, to make sure everything blends seamlessly, I use the reference view tool in Lightroom. I place the images side by side and carefully adjust the colours so they match as closely as possible across the different photos, even when they come from different cameras or sensors. This way, the full set feels consistent, and viewers are not distracted by colour shifts between drone and ground shots.
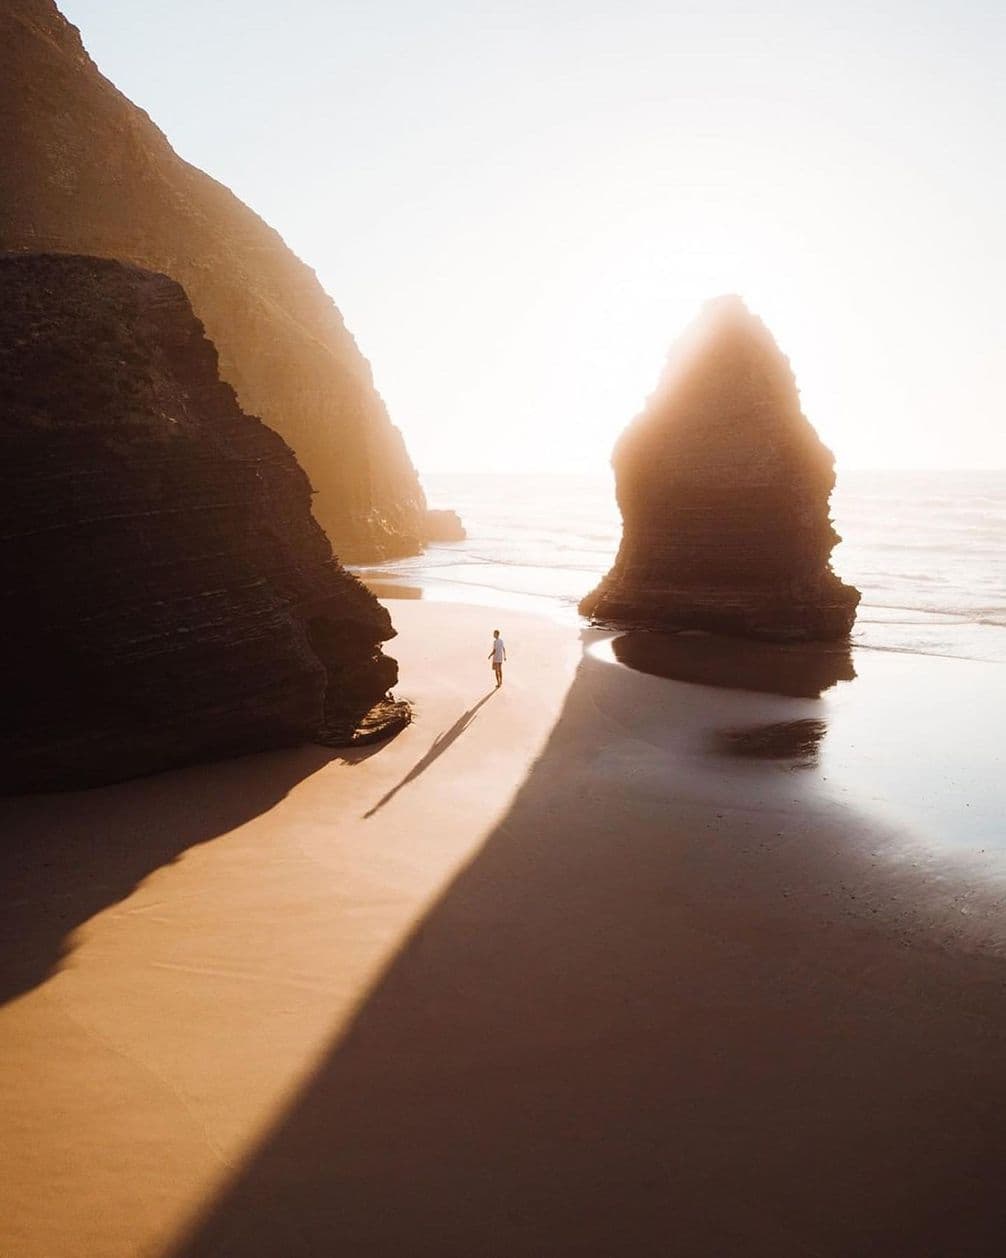
Photo: Mathias Fernandes
Have you experimented with vertical‑video drones now that social media favours 9:16?
When I photograph or film, I always capture the content in horizontal format, not vertical. Even if I know that the final output might be vertical for social media, I frame the shot so that the centre portion of the frame is optimised for vertical cropping later. This way, I am future-proofing my content. Many of the landscapes I capture work beautifully in horizontal format, which is perfect for printing and long-form projects.
At the same time, I can still extract high-quality vertical versions for social media while maintaining the original wide composition for other uses. For video, I also film horizontally so I have the footage ready for YouTube, and then crop vertically when needed for mobile platforms. This workflow allows me to get the most flexibility from each shoot without compromising on quality or creative intent.
Portugal’s new Remote ID rules went live in January. Has that changed your workflow?
The Remote ID rule means drones need to broadcast their identification and location information. With my Mavic 3 Pro, most of the Remote ID process is handled automatically by the drone itself. It broadcasts telemetry data like my drone’s position, altitude, speed and my operator ID in real-time while flying. This information allows authorities to monitor the airspace safely and ensure that all drones are operating legally and transparently.
Even before the law came into effect in January, I was already fully registered with the Portuguese Aviation Authority, both as a drone operator and pilot, and my drone was properly registered as well. So when the new regulation officially came into effect, I was already fully compliant and had everything up to date. This allows me to fly my drone with peace of mind, knowing that I am operating safely, responsibly and according to the law. It also makes the process of pitching and executing commercial projects much smoother because I can reassure clients that all flights are fully legal and compliant.
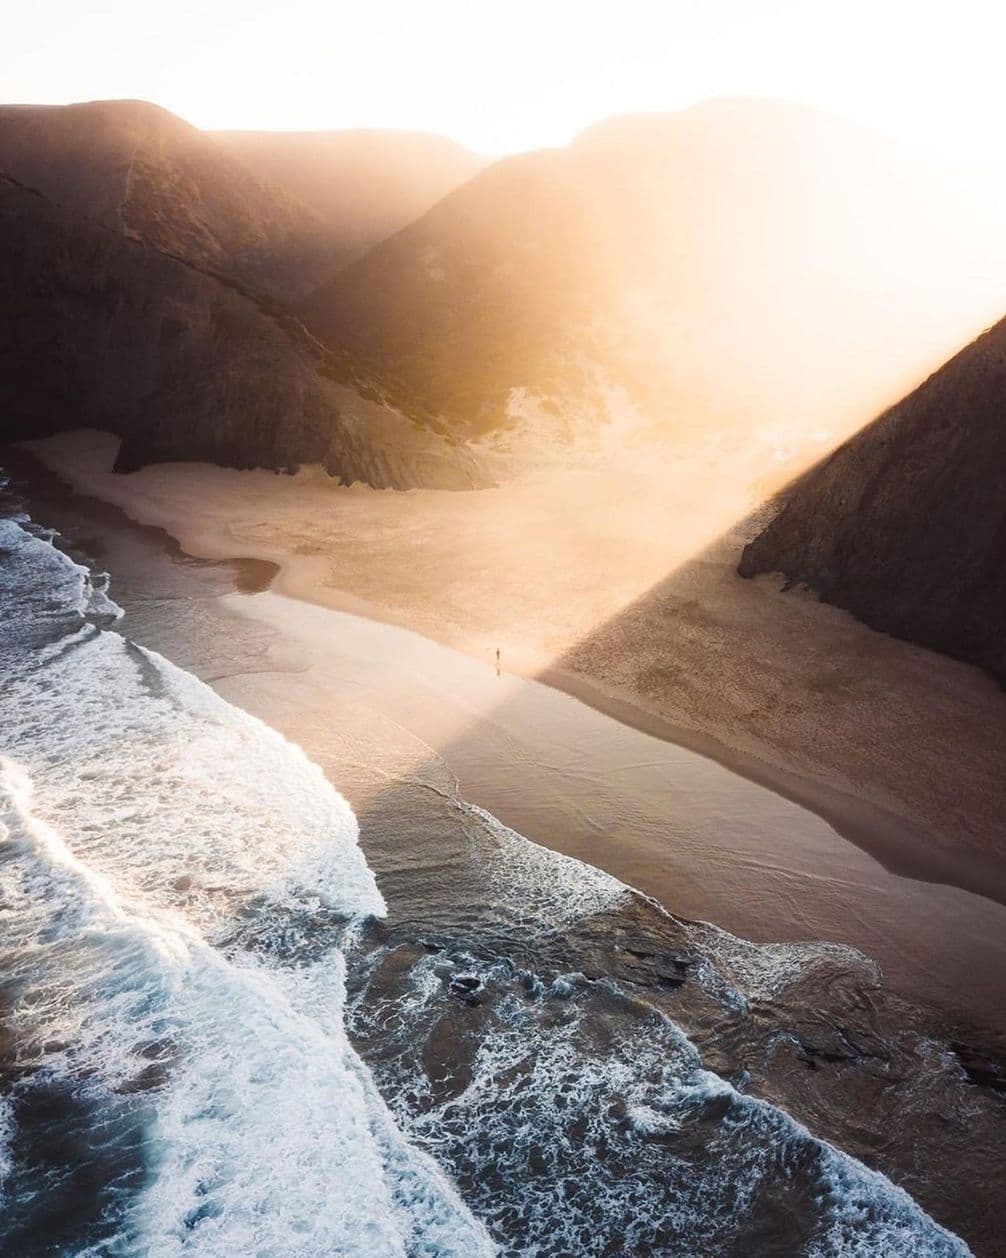
Photo: Mathias Fernandes
Walk us through a favourite one‑take sequence where a drone solved a storytelling problem a handheld couldn’t.
For me, drones are perfect for establishing shots. Whether it is for photo series, video projects or short films. I often work with landscapes, and having a camera in the air is the ideal way to introduce a scene. In photography, this could be a wide, open landscape that sets the mood and context before moving into more medium or close-up shots of the subject.
In video, I especially love using slow reveal shots where the drone gently unveils a landscape or location. It creates a beautiful transition and helps the viewer gradually enter the space. Drones allow me to establish locations or transition between faraway places in ways that simply wouldn’t be possible with a handheld camera.


In your Creative Escape workshops, what one lesson instantly lifts students’ aerial images?
As I mentioned earlier, the most important thing is to train your eye. Practice creating images, even with regular cameras first, and learn how to build compositions that have a strong sense of depth. Depth can be created in many ways – through colour, light, contrast or the relationship between subjects and background. This is something every photographer should spend time exploring and mastering, because once you understand how to create depth, you can apply the same principles when flying a drone. In the end, the drone is simply another tool – another camera. What makes the image strong is not the fact that it was shot from the air, but how well these creative fundamentals are applied to the scene.