Photography
Master depth of field in your iPhone photography
Learn how to use depth effect on your iPhone to create cinematic portraits and dreamy backgrounds


Photography
Learn how to use depth effect on your iPhone to create cinematic portraits and dreamy backgrounds
This guide is brought to you by Dan Mold – a Cambridgeshire-based, prize-winning photographer and author with over 13 years of photojournalism experience. Dan is also a former Adobe-certified Photoshop guru, so you know his tips are worth trusting when it comes to getting the most out of your images.
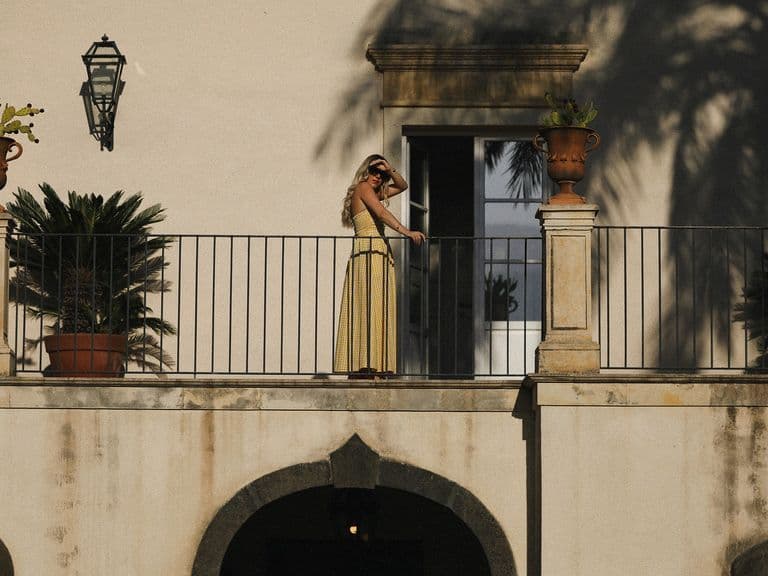
Depth of field refers to the area of “acceptable” focus in a photograph, and when shooting with smartphones, this is typically quite deep. This is largely due to their small sensors, which contribute to the compact, pocketable nature of these devices. The size of an iPhone’s camera sensor varies slightly between models, though all are considered small and compact by most standards.
In recent models, Apple has opted for slightly larger sensors compared to those in the iPhone 14 and earlier generations. The 1/1.56” sensor found in the main cameras of the iPhone 15 and 16 is roughly half the size of a 1” sensor, like the one used in the Xiaomi 15 Ultra. For comparison, more than 16 of these iPhone sensors would fit inside a professional full-frame camera sensor. While small sensors are still capable of producing excellent images, they make it much more difficult to achieve a shallow depth of field and that desirable background blur.
That said, there are some clever tips and tricks you can use to improve your chances of achieving blurred backgrounds – and with modern AI tools, it’s even possible to artificially blur the background in post‑production using apps available on the Apple App Store. Let’s take a closer look at depth of field options on the iPhone.
Bokeh – the Japanese word pronounced “bok-ay”, describes the quality of out-of-focus highlights in a scene. This is usually done by shooting with a wide aperture, closer to the subject or zooming in to exaggerate the background blur.
Carefully considering the background behind your subject is also important, as including neon signs, string lights or even light reflecting off leaves will add up to more impressive-looking bokeh in your photos, which helps separate your subject from the background and makes them look more cinematic and professional. If you’re working on a small scale you could even add your own lights to the background of your scene to turn into beautiful bokeh balls.

Separate your subject and background using the bokeh approach
The small sensors used in iPhone cameras naturally produce a deep depth of field. To get started, open the Camera app, switch to Photo mode, and choose whether to shoot in the compressed HEIF format or in RAW for more image data. Make sure your camera isn’t positioned too close to your subject – aim for a distance of at least 20cm or more. This typically won’t be an issue for group shots or selfies.
It’s also worth noting that the wider your focal length, the greater the perceived depth of field. While the iPhone’s main camera should have no trouble rendering a deep depth of field – and will usually deliver the best image quality – you might consider zooming out and using the ultra‑wide lens, if your iPhone has one. This can help avoid the more compressed field of view produced by a telephoto lens.

Experiment with a deep depth of field

Widen your focal length for greater perceived depth
Apple’s iPhones include a Portrait mode in the default Camera app that allows you to control the F‑stop number for the aperture, though this is done digitally in software to simulate a depth of field effect. In traditional photography, the aperture is the opening inside a camera lens, created by a series of blades that can be widened or narrowed to control the amount of light reaching the sensor – and also to influence depth of field, or how much of the scene appears in sharp focus.
Aperture values are measured in F‑stops, with each stop representing a halving or doubling of the light entering the lens. However, most smartphones – including iPhones – use a fixed aperture rather than adjustable blades, which helps keep the camera module compact and lightweight. The aperture adjustment in iPhone’s Portrait mode is therefore achieved artificially using advanced AI software, simulating different depth of field effects. One advantage of this approach is that you can change the depth of field or lighting style even after you’ve taken the photo.
When you shoot in Portrait mode, the Camera app will prompt you to move closer to your subject until their face is framed within the on‑screen reticle – only then can you tap the shutter button to take the shot. At the bottom of the camera interface, you can also swipe through various lighting effect styles, including Natural Light, Studio Light, Contour Light, Stage Light, Stage Light Mono and High‑Key Light Mono.
After capturing a portrait, you'll find it in your camera roll with a Portrait drop‑down menu above it, which can be toggled on or off. Tap the adjust icon at the bottom of the screen and swipe left or right to change the simulated depth of field. On the iPhone 14 Pro I had on hand, I could swipe left to the widest simulated aperture of f/1.4 for a strongly blurred background, or right to f/16 – or Off – for a deep depth of field where everything is sharp from foreground to background.

Shallow depth of field with a camera

Deep depth of field with a camera

Swipe through various lighting effect styles

Swipe left to the widest simulated aperture of f/1.4 for a strongly blurred background

Swipe right to f/16 – or Off – for a deep depth of field where everything is sharp from foreground to background
To give yourself the best chance of achieving a shallow depth of field and a nicely blurred background with an iPhone, it’s important to understand that depth of field becomes much more limited when shooting close to your subject – also known as macro photography. Use the iPhone’s Close‑up mode by going into Photo mode and tapping the Macro icon in the bottom‑left corner of the screen. This appears as a yellow button with a black flower symbol and enables the camera to focus as close to the subject as possible.
It also helps to ensure the background is clearly part of your composition. The further away the background is from your subject, the more effectively it will blur. For instance, if you’re photographing a pet, avoid shooting from head height directly downwards – this tends to place the grassy background immediately behind the subject, leaving little room for background separation. Instead, get down to the pet’s eye level to push the background further away, and position yourself close to the subject to take full advantage of the iPhone’s macro capabilities.
As a final tip, switch to Portrait mode and ensure the aperture is set to its widest setting. Keep in mind that your chosen focal length (zoom level) can affect the available aperture range – so scroll through the zoom options and select the one that gives you the lowest F‑number, as this will offer the most pronounced background blur

Use the iPhone’s Close‑up mode by going into Photo mode and tapping the Macro icon in the bottom‑left corner of the screen

The further away the background is from your subject, the more effectively it will blur

Your chosen focal length (zoom level) can affect the available aperture range
Apple’s Depth Effect uses depth mapping data to give your images a subtle 3D appearance. It works particularly well with photos taken in the iPhone’s Portrait mode, allowing you to adjust the focus area after the image has been captured to simulate a different depth of field. The lock screen depth effect also functions effectively with certain illustrations and graphics.
To use this feature, you’ll first need a photo taken in Portrait mode using the iPhone’s Camera app. From your home screen, navigate to Settings > Wallpaper (you can also access this from the lock screen) and select Add New Wallpaper. Tap Photos and scroll down to find the Portrait mode image you’d like to use.
Once selected, your subject should be cut out automatically, with the date and time appearing partially behind them to create the depth effect. You can tap different areas of the screen to add or remove widgets, and pinch to zoom in or out – this adjusts the size of your subject and how they layer against the background elements, enhancing the depth illusion. When you’re happy with the setup, tap the blue Add button in the top‑right corner. You’ll then have the option to Set as Wallpaper Pair or Customise Home Screen if you’d prefer a different image there instead.

Step 1: Go to Settings > Wallpaper

Step 2: Select Add New Wallpaper

Step 3: Tap Photos

Step 4 : Scroll down to find the Portrait mode image you’d like to use

Step 5: Set as Wallpaper
Blur your pictures at the touch of a finger with the Blur Background app to make your portraits pop, blur backgrounds and apply artistic blur effects, filters and text effects.

Features of Blur Background
Use the Virtual Focus feature within the Bokeh+ app for iOS to focus on a specific part of the picture, experiment with depth of field effects and custom affected areas.

Features of Bokeh+
This app is designed for Apple iOS iPad and iPhone and claims to make professional portraits with a background blur like the ones you would create with a professional camera.

Features of Blur Photo: Portrait Mode Blur
Why not check out “How to take black and white photos with your smartphone” and “How to use depth effect on your Android devices”.